Project Updates – MGB & Datsun 240Z

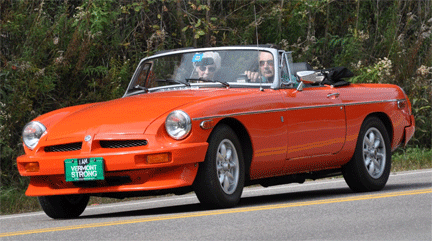
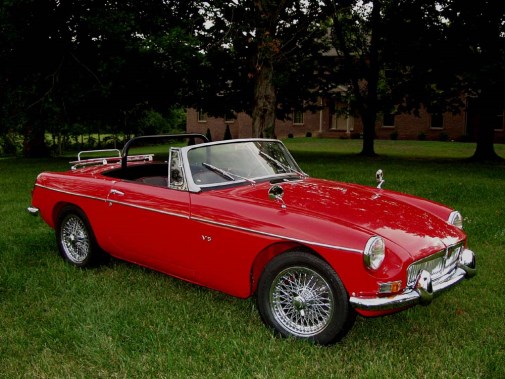
Absent any questions this month, I will give a brief update on the projects I am working on. The MGB project is progressing nicely. The front suspension has been rebuilt. All the metal parts have been wire brushed, cleaned and painted. The cast parts were painted with a coat of “cast blast” lacquer to replicate the look of clean cast iron. The steel pieces (brake dust shield, lower A arm and all hardware) were painted with POR black paint. This will provide a durable and long lasting paint protection.

1972 Datsun 240Z
The ’72 Datsun 240Z “Gift-wrapped”

The entire brake system has been overhauled. Many metal lines were replaced with Nickle-Copper lines, affording an opportunity to learn how to shape hard lines and how to create bubble and double bubble flares. All the rubber hoses were replaced. The calipers and master cylinders were rebuilt, and the shoes, pads and rear wheel cylinders were replaced. Brakes were adjusted and the wheel bearings were repacked with new grease seals.

The generator, distributor and carburetor were rebuilt. Last week the car was started, the first time it has run in 30 years. We let a mixture of ATF and Acetone soak in the cylinders for some time before we changed the oil. The engine turned over easily. The engine started right up, however, some of the valves were sticking. We let it run for about 20 minutes, then slowly poured seafoam into the carburetors. This week we will set the ignition timing, and adjust the carbs and the valves. We will also set the front wheel toe-in alignment using two parallel strings strung through the axle center line and a dial caliper. We will move on to the rocker panels and the floor pan replacement.

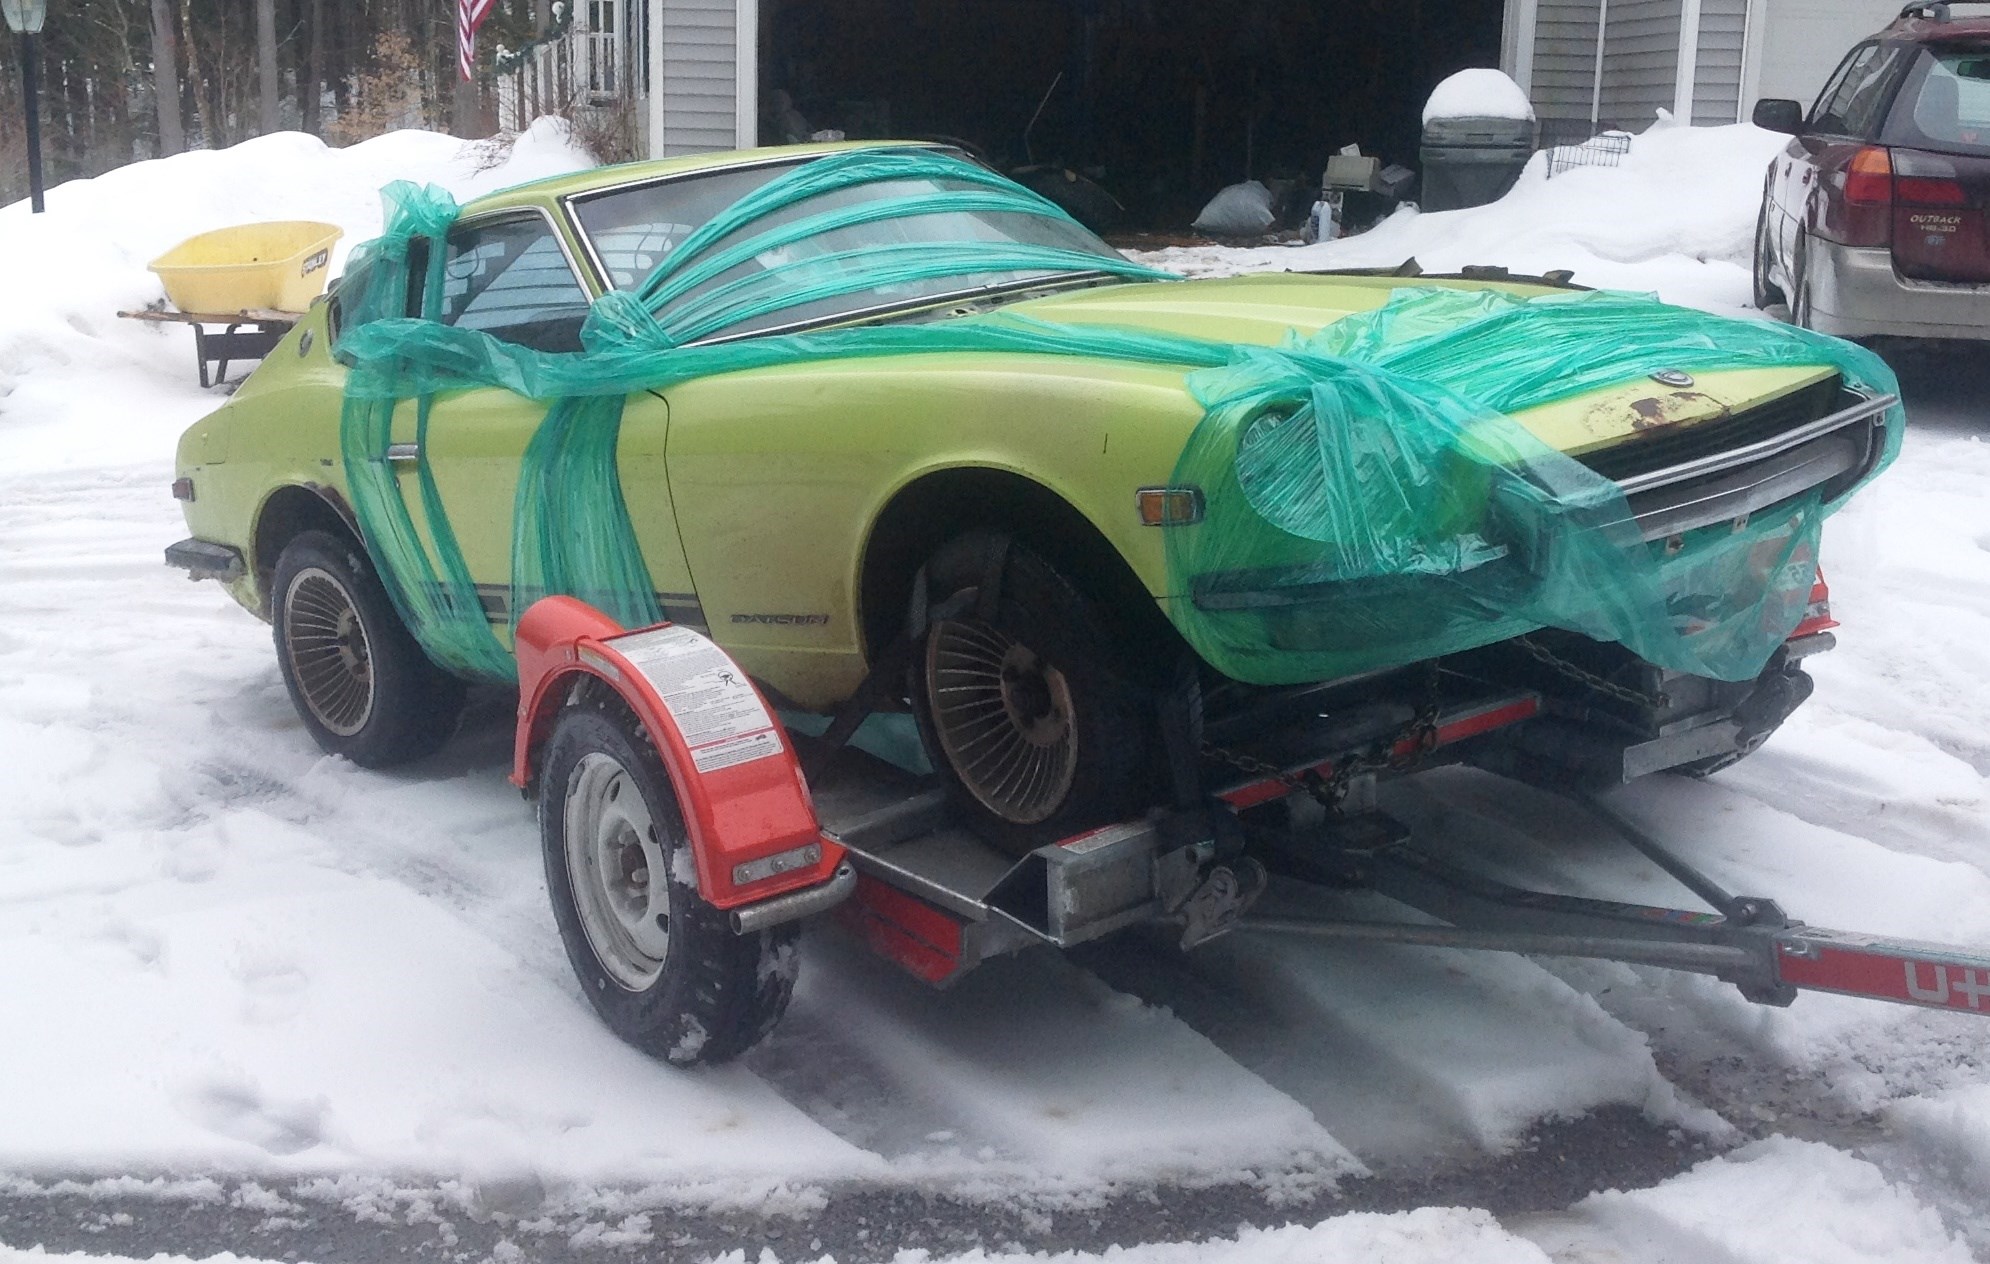
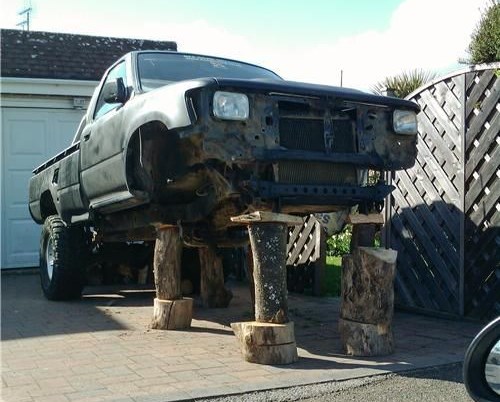
I have another project in the garage, my son bought a 1972 Datsun 240Z. This car has rust in the usual places. It is getting new rocker panels, floor pans and rear quarter panels. Fortunately, the car came with all the body panels. This car will be a father/son restoration project. The car is solid enough, but will probably end up being a full ground up rotisserie restoration.

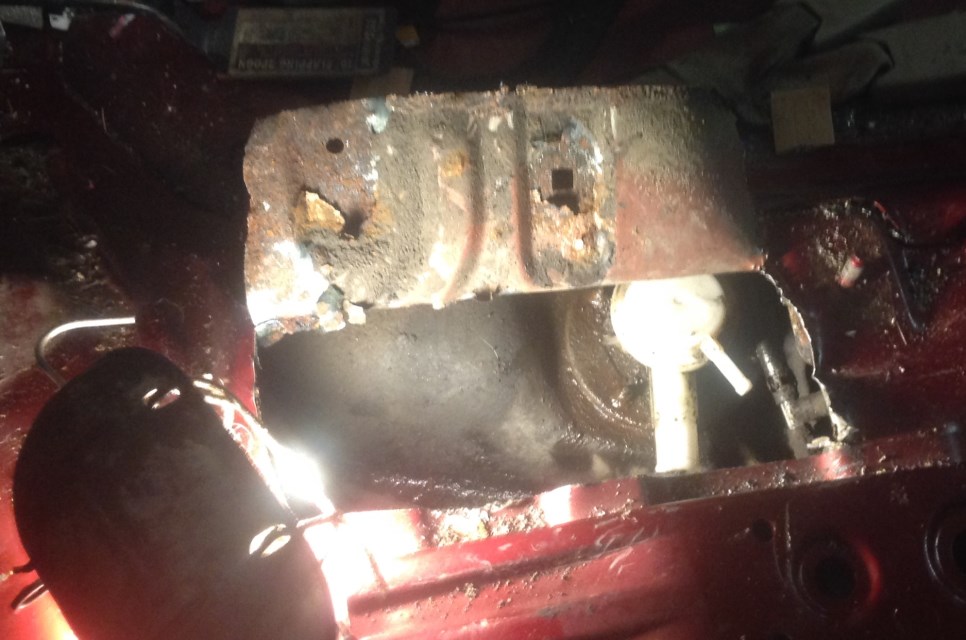
The driver’s side floor and rocker panel have been replaced. Most of the rust repair on the left side has been completed. After the rear quarter panel is done we will test fit the front fender and the door, adjust all the gaps, then move on to the right side. Once all the welding is complete, the engine, transmission, front and rear sub frames, the front and rear suspensions and the rest of the interior, will be removed. The car will go on the rotisserie for all the body work and final painting. Stay tuned…

Get a Bigger Hammer

A few days ago, I was rummaging about in the cellar, looking for something, and I came across my X-C skis. They are the old wooden kind that you had to wax every time you used them depending on the weather and conditions. I also found my bamboo ski poles that I had used occasionally, when the ice replaced the snow in the yard. Then, there were my old shoes that I could never fit into now!

Over the next few weeks I started to think about all the X-C skiing that I once did. Mostly here in town, with friends, the kids or the dogs, on ski trails or bush-whacking here on our property (before the era of cell phones, horrors!) I recall one specific winter when we had purchased an old VW bug from a neighbor. It was orange and beat up enough so that a few more dents or scratches didn’t make any difference. A good car for us! For a number of years a friend and I ran a Bill Koch ski club here in town for kids and we would meet every Saturday at the local school. From there we would ski all over, on ski trails that were in existence everywhere then. Somehow, we managed to fit three to four people in the VW along with our ski equipment. No big deal! One particular Saturday, Gael was getting ready to drive to Florida to visit his brother and the kids and I were getting ready to go to the Bill Koch Club to go skiing. Gael’s parting comment went something like this… “If the car won’t start, crawl under the car and hit the starter with a hammer”. No problem. It sounded easy enough. Gael leaves and we get into the VW. It won’t start. So I crawled under the car and looked for the starter. I wasn’t sure what I was looking for, so I called a neighbor who came over and we proceeded to crawl under the car together with a hammer. He showed me where the starter was, hit it and I crawled out, got into the car and it started. Whew! I thanked him and we drove off to our skiing afternoon.

For the next few weeks, I carried a blanket and a hammer in the car and had to use it quite a few times, but it always worked. I also dis-covered that, with a push from someone or something, I could usually jump start the car that way. Another reason for having kids! If I had to venture out of town to the grocery store, I usually took our son and quite often a friend of his with me, just in case! I would park in the grocery store parking lot in such a way that, with a push from the two boys, the car would start. It usually meant that the boys would have to go into the store with me, but we separated when inside, me to get the groceries and them to do something to kill time. One time I happened to see rolls of toilet paper being tossed over isles and I know they had found something to amuse themselves. I don’t remember what happened to that car or what replaced it. It might have been another VW bug with the driver’s seat on a piece of plywood or a Saab that came from Joe Kaelin. Both of these cars have unique stories to go with them. I’ll save those for another time.

To the editor…..

I don’t know if you take reader’s responses to articles, but Nancy’s article brought back vivid memories of sliding down the “Mary Fletcher Hospital” hill in Burlington. We used to go down to Sears on Church St. and get cardboard washing machine boxes, pile in 2 or 3 of us and blindly bomb down the steepest part of the hill, trying to see if we could make it all the way to Colchester Ave. and possibly get run over. Ah, the good olé days of being put out with the dog and told “don’t come back till dinner time!”

Bill Fagan

MG Update

I have not received any questions this month, so I will give an update on the MGB project I am helping the high school student with.

When we adjusted the valves, I was able to use my camera scope and explain how a four cycle engine works. The principle of the carburetor operation was easy to understand while rebuilding the carburetors.

I have taught her how to rebuild the brake master cylinder, the brake calipers, and the clutch master. I have taught her how to cut and form metal brake lines, make bubble flares with a flaring tool, replace brake pads and brake shoes, and how to adjust drum brakes.

Together we replaced the kingpins in the front suspension. Taking the suspension apart, I was able to show her how the suspension worked. She got hands on experience disassembling, rebuilding and then reassembling the suspension.

We disassembled the generator, soaked the bronze bushing in engine oil, dressed the armature, replaced the brushes, cleaned, paint-ed and reassembled it. We polarized it, then tested it before installing it back on the car.

More hands on experience was to be had when I walked her through how to replace the wheel bearings. She was able to knock out the old bearing cones and install the new ones. This was followed up with packing the bearings and installing new grease seals.

We even successfully banged out a good size fender dent. We may weld in new floor pans and rocker panels.

I am so impressed with how quickly she is able to learn new skills, and master these tasks. All through the project she is learning how to properly care for tools, and keep all the parts well sorted. We are carefully saving all of the old parts, and every work session ends with carefully wiping the tools down with a rag, then putting them away, clean.

The MGB is a great car to learn from. It is simple enough to use as a model for explaining and demonstrating how the systems of a car work, yet modern enough to be relevant.

We need to continue projects like this one to keep our youth invested in the hobby. In a few weeks this MG will be ready for her to drive it to school. Amazing, considering the car had been parked outside for years before she was born, and has sat idle her entire life.

mgb brake calipers

Yup, the calipers both looked like the one on the right, now they look like the one on the left. Cleaned, and new pistons, seals and dust seals.

1930 Ford Model A “Tudor”

Does anyone know why Henry Ford decided to call this Model A a “Tudor“? Read on for a couple of theories…

Don Pierce's 1930 ford model a tudorDonald and Anne Pierce found this 1930 Ford Model A in the 2015 VAE car show “Car Corral”. The purchase took them back another 25 years, toward the beginning of the auto era for them. Their oldest at that point was their ’55 Dodge panel Truck. Don’s Model A was restored by John and Chris Center of West Rutland in the 1980s. Don purchased the car from Bill Pinkham of Monroe, New Hampshire. He had wanted an older vehicle and is very happy with his Ford choice. It’s a very reliable car, he says.

The Ford Model A was the second huge success for the Ford Motor Company, after its predecessor, the Model T. First produced on October 20, 1927, but not sold until December 2, it replaced the venerable Model T, which had been produced for 18 years. This new Model A (a previous model had used the name in 1903-04) was designated a 1928 model and was available in four standard colors.

1930 ford model a tudorBy February 1929, one million Model As had been sold, and by July 24th, two million. The range of body styles ran from the Tudor at $500 (in grey, green, or black) to the Town Car with a dual cowl at $1200. In March 1930, Model A sales hit three million, and there were nine body styles available.

Model A production ended in March, 1932, after 4,858,644 had been made in all body styles. Its successor was the Model B, which featured an updated 4-cylinder engine, as well as the Model 18, which introduced Ford’s new flathead (sidevalve) V8 engine.

There were 376,271 Tudors built in 1930. They weigh 2348 pounds and the L-head 4-cylinder engine produces 40 brake horsepower at 2200RPM (rated horsepower is 24)… see footnote.

1930 ford model a tudorDon is our VAE treasurer and in his spare time operates three businesses. There is Melody Electric, his residential company and Middlesex Electric, his commercial electric company and finally Kerin’s Sign Service. Don started his electrician career in 1973 as an apprentice and got his journeyman’s license in 1977 and his master electrician’s license in 1979. In 1983 he started his own business. Don’s wife, Anne, is in her 28th year as a court reporter in the federal court house in Burlington. Wheel Tracks was told Anne has not driven the Model A yet, maybe we will see her driving it at one of our events this summer…

Footnote… What is the difference between rated horsepower (HP) and brake horsepower (BHP)?

Horsepower was figured “back in the day” when, mostly, four legged creatures were used.

Invented by James Watt, one horsepower originally was measured by the amount of work, that a horse lifting coal out of a coal mine, could do in a minute. Back then, one HP equated to 33,000 foot-pounds.

So, what is BHP? Well, if you take all the items off the car that the engine needs to power, like the transmission, the water pump, the generator… everything , you have an engine with no work to do and all kinds of extra power. That is brake horsepower.

This Model A Ford needs 16 of its horsepower, out of the 40 HP it produces… just to sit and idle.

You pick… Henry Ford used the Tudor name because…

  1. The House of Tudor, the royal house of Welsh and English origin, descended in the male line from the Tudors of Penmynydd. Tudor monarchs ruled the Kingdom of England and its realms, including their ancestral Wales and the Lordship of Ireland from 1485 until 1603. Henry Ford thought that was cool.
  2. It was a marketing ploy. Manufacturers had pet names for different body styles. The model T touring car became a phaeton on the model A. It sounds better. The tudor (2-door) and fordor (4-door) were marketing terms designed to stick in the minds of the public.

All Lined Up (2)

Several months ago I received an email from a Vermont high school student through my MG club’s website. This high school senior ex-plained that to graduate from high school, the school required seniors to complete a senior project. This project required an adult to mentor them and guide them through the project.

The project is a 1964 MGB that has been parked in a wood shed for decades. The car was not put into storage, it was simply parked. To get the car running, all of the fluids needed to be changed, the front suspension needed to be overhauled, the carburetors needed to be rebuilt, the fuel pump and fuel lines needed to be replaced, the radiator and the water pump needed to be replaced, and the brakes needed a thorough overhaul.

I have assisted this high school student with the project for the last few months. The car is almost road worthy. The initial startup is only days away.

This project is very important to me for several reasons. It is very rare to find a high school student with an appreciation for auto-mobiles, and an interest in learning how they work and how to maintain them. I am enjoying the opportunity to teach a teenager how to maintain a car, and I am also glad to be returning another MG sports car…. back on the road.

The really nice part of this story? This high school student knows how to drive a standard, and she is a woman.

The picture below is one found by Wheel Tracks on line. What a beauty.

The car to the left might be like this someday.

How many of you would like to know more about this high school student and her plans for the future. Is she at one of Vermont’s Career Centers.

Maybe if we ask Dave ‘real nice’ he could ‘author’ something for us.

Nostalgia

Probably because I just celebrated (I use that word loosely) my 69th birthday, I got to thinking about the past and what my children and grandchildren have and are missing out on.

Last Tuesday, while sitting with fellow ‘hookers’ (rug) and watching the snow come down, my thoughts ran to cardboard. I’m sure you are saying the same as a couple of the ‘younger hookers’ in the room (they are in the late 50’s) “cardboard”? At the time I didn’t realize I had said the word out loud. It certainly wasn’t a subject that had come up before and believe me we cover a lot of subjects! Yes, cardboard. Haven’t you ever gone looking for or in off seasons kept your eye out for the perfect piece of cardboard for sliding on the snow. Cardboard works in just about every snow condition when Flexible Flyers and Toboggans don’t. Cardboard can carry one or more persons depending, of course, on the size and sturdiness of the cardboard piece. Blaze a trail and off you go, snow spraying your joyful face and maybe a little fear in your heart if the trail is a steep one. Then, at the bottom, you pick up your cardboard and truck to the top and do it all over again. So, as you can see, cardboard could be the perfect sled, light, so portable, works in almost all snow conditions and when it wore out or got left behind or forbid, stolen, just find another piece. I spent the first 6 grades in a one room schoolhouse and our teacher, Mrs. White, let us use our ‘art class’ personalizing our piece. And I might add, we were ‘green’ before we knew we should be. Cardboard left to the elements of snow and rain disintegrates and returns to the earth! How great is that?

On our way to the movies Wednesday, looking out at what could be great sliding hills, the moon shone on what looked to me to be Nirvana- crust. This makes for a perfect sliding experience.

My sliding days are over (at least the sliding that is fun) but I look back and remember what fun we had and if you used cardboard, no expense. Because of these memories, I never look at cardboard without evaluating it for its ‘higher purpose’.

All Lined Up

About a year ago I replaced the steering rack in my minivan. That replacement rack blew out during the cold snap in December. The good news was the part was covered by the warranty. The bad news was after I replaced the rack, I needed to do a wheel alignment.

Since I had the alignment done a year ago, I knew the castor and camber were fine, I just needed to adjust the toe in. I was not willing to expend another hundred bucks for an alignment.

jack stands positioning
Correct jack stands positioning

I set up four jack stands in the garage at each corner of the van. I strung yellow carpet thread between the two left and the two right jack stands. I used carpet thread as it is strong, and thin. It gave me a very thin and straight reference point to take a measurement from. I was able to extend the jack stand, at exactly the same height as the center line of the axle (through the center of the wheel), giving me a reference line extending through the axle center line, from the front to the back of the vehicle. To ensure the left and right string lines were exactly parallel, I ensured the two front and two rear jack stands were exactly the same distance apart. I used the 3,4,5 rule to ensure the two rear jack stands formed a right triangle with one of the front jack stands. Three feet out on the base line from one rear jack stand to the other jack stand, four feet out from the rear jack stand toward the front jack stand, then the hypotenuse, connecting these two points was five feet.

wrong jack stands
Incorrect “jack stands”

I used a ratchet strap to hold the steering wheel exactly in the dead straight ahead position. I adjusted the tie rods to achieve a slight 1/16″ toe in on each front wheel, achieving an overall 1/8″ toe in. I checked the measurement between the edge of the rim and the string, with the front measurement being 1/16″ more than the rear.

Idle Time is Memories Motivation

The other day, looking for “busy work” so as to avoid jobs like cleaning the cellar, etc., I chanced on my teens era RCA Victrola. It’s a trade model and has always been quite good. I put on a Victor “double disc” record, wound up the machine, released the turntable brake and awaited music. The turntable barely turned and the terrible low speed music was accompanied by an unfortunate reoccurring screech. I know quite a lot about this machine’s history and it has had minimal and gentle use. Nothing to do but to take it apart and see what’s wrong. Inside there is a care and maintenance label. It suggests lubrication. RCA wants you to use Vaseline…but there was a little blue jar of Vicks Vaporub. Just medicated vaseline, right? Dave’s garage would be proud of me! Did it fix the Victrola? No, but the gear train worked real smoothly and smelled healthy just like me. The problem turned out to be a slight warping of the aluminum turntable so the underside would hit on the breaking mechanism, drag down the speed and screech. I ground down the high spot and now it’s all music to my ears.

In the 1950’s, Mahlon Teachout bought a Victrola from the estate of a woman who was said to have received it as a gift from a suitor who never returned from WW1. She never could bare to play it and it was put away.

Some time later, I got it in a kind of complex trade with Mahlon. He got a small plot of land and a ruined saw mill building and I got the Victrola and a 1920 Buick GK45 touring car. The Buick made it to one of the first Stowe Car Shows but I cannot say for sure, the very first. I sold it to get married in 1960 but I still have the Victrola and good memories of both.

Ramblings from an Aging Mind

Wow, survived the holidays with no more cracked ribs or crushed toes. This included cookie day with our daughter, our friend and her daughter, family get-togethers; didn’t have to wrap presents as a friend likes to do that?? We got the tree set up with the lights on so that the grandchildren could decorate it on Christmas Eve. After that three generations watched the Muppet movie.

We did lack snow, but pretty sure we will be getting some very soon – this is Vermont. For now, it serves to remind me that I have not raked the leaves yet. Oh well, they will still be there in the spring! The holidays being behind us now means thinking about getting the garden ready for planting (I will remember to plant Brussel sprouts this year), cleaning out the asparagus bed and being able to hang out washing again. Oh, and lawn mowing, but Wendell and the rider mower do that these days. I kind of miss pushing around the old mower, but there will be flower beds to clear of fallen tree limbs and rose bushes to trim, so no lack of projects.

I have been feeding two stray cats, but cannot get them to let me touch them. I would take them to the Hu-mane Society if I could catch them because our cat would not welcome them. You may notice that I said “our cat”, as his previous owner still cannot have him in his new place, but then, without him, who would sleep on my bed at night! So, I guess it all works out. Anyway, hope everyone’s holidays were fine and we wish all a very Happy New Year!!!!

Plan B

Several years ago I began getting a check engine light on my Subaru Outback. The code was being caused because the emissions self check determined there were unturned hydrocarbons, venting directly from the gas tank to the atmosphere, not through the char-coal canister as designed. This is often referred to as “the gas cap code”.

The light came on more frequently until several months ago when it remained lit all the time. A couple of weeks ago I pulled in to a gas station. The pump island was not level. The driver’s side of the car was several inches lower than the right side. As I topped off the tank I smelled gas, and saw gas dripping down from the tank. Ugh!

I put the car on the lift and found gas seeping from a plastic valve on the top of the tank. Now, Subaru was kind enough to put an access panel in the floor, under the rear seat, to access the fuel pump. They were also kind enough to place an access cover over the fuel sending unit. Servicing these two items is quite easy, and does not require dropping the tank. Unfortunately, there is no way to access this plastic valve without dropping the tank. The two access covers are very far from this plastic valve.

To remove the gas tank on this car, first the drive shaft, rear axle, rear suspension and the exhaust system needs to be removed. Then, the tank can be lowered. When pricing parts, I discovered the gas tank straps are no longer available from Subaru, and not yet available in the aftermarket.

I had a hard time justifying the time and expense to perform this task on a 14 year old car with 247,000 miles on it. If there was only a way to ac-cess the valve from inside the car, if only…

subaru gas tank removalWell, it took less than a minute to cut a hole in the floor with my saws-all. After the valve was replaced it took about ten minutes to weld the metal back the way it was. Interestingly, it looks like the valve failed because something dissolved the plastic, I believe it was ethanol. This was also a good time to coat the area with a liberal thick coat of Fluid Film.

With the valve replaced the threat of gas vapors was gravely reduced it was safe to weld. I was more than a little on edge welding so close to the gas tank. I placed a piece of sheet metal between the tank and the floor. I had two fire extinguishers and water on hand, just in case.

Yea, this was a hack job, but a very well done hack job.


Please email all inquiries to: Dave
or snail mail
32 Turkey Hill Road
Richmond VT 05477