Polyurethane Bushings – Dave’s Garage

I am a believer in keeping things original, to a point. Sometimes I have an opportunity to take advantage of an improved technology, and I use it. One such example is the substitution of polyurethane bushings in place of rubber bushings in suspension systems.

I replaced the sway bar bushings several times in my Chrysler minivan. Sway bar bushing failure was a known problem. I was reading about this problem on line, and I read a suggestion of replacing the bushings with urethane bushings in place of the OEM rubber bushings. I reluctantly did the substitution, and was very surprised to see that not only did the urethane perform much better, but they also held up better. I have not had to replace them since. By the way, even Chrysler acknowledged this problem, and have since substituted urethane bushings as replacement parts in this application.

I am not talking about the cobalt blue or bright orange bushings people use to dress up a chassis, I am talking about black urethane bushings, that look just like OEM rubber bushings.

I have recently replaced all the suspension bushings in three English cars. Two of these cars are cars that I rebuilt the suspension on years ago. In all three cases, the rubber had deteriorated and failed. I ended up replacing the bushings in the lower A arms of the front suspension, sway bar and the bushings on all the leaf springs and spring shackles with the new, and much improved urethane bushings.

After dis-assembly and cleaning, I put a thin film of grease on the new bushings before I assembled them, to prevent squeaks. In all three cases, the cars drove better, the suspension was tighter, quieter, and suspension travel was smoother. I was astonished at the improvement in performance over the rubber bushings.

These bushings not only perform better, they will also look “new” indefinitely. Check your favorite parts supplier or look on line.


Please email all inquiries to: Dave
or snail mail
32 Turkey Hill Road
Richmond VT 05477

Brake Fluid – Dave’s Garage

This month we have a question about  brake fluid from Ed Hilbert.

Hello David,

I am redoing all of my Mercedes brake components except for the steel brake lines which appear to be in good shape. What are the different types of brake fluid and when to use each type? Would I do well to change over to the newer silicone brake fluid or stick with the standard DOT type 3?

What are the advantages of the silicone over DOT 3 – perhaps silicone won’t absorb moisture and thus lessens the chance of rust? If I do change over, must I completely flush out the old fluid and if so with what – alcohol? How incompatible are the two types of brake fluid?

What is brake fluid made of? Why is it used instead of standard motor oil?

Can it be used as a paint stripper? If so, how would one clean it off the surface so paint would stick again?

Anything else we should know about brake fluid?

Thanks for your expertise!
Ed

Dear Ed,

The types of brake fluid are DOT 3, DOT 4, DOT 5 and DOT 5.1. DOT 5.1, like DOT 3 and DOT 4, is a polyethylene glycol-based fluid (contrasted with DOT 5 which is silicone-based). Polyethylene glycol fluids are hygroscopic and will absorb water from the atmosphere, necessitating a flush/replace every couple of years. Polyethylene glycol fluid WILL absorb moisture. Failure to replace contaminated brake fluid will lower the boiling point of the brake fluid, and the moisture will cause rust and corrosion of the brake system. Silicone, DOT 5 fluid will absorb just a minuscule amount of water.
Brake fluid is classified by its boiling point. The “dry” boiling point is with no moisture in the fluid. The “wet” boiling point is brake fluid with moisture in it. “Wet” brake fluid is defined as having 3.7% water by volume.

Dry boiling point Wet boiling point

  • DOT 3 205 °C (401 °F) 140 °C (284 °F)
  • DOT 4 230 °C (446 °F) 155 °C (311 °F)
  • DOT 5 260 °C (500 °F) 180 °C (356 °F)
  • DOT 5.1 260 °C (500 °F) 180 °C (356 °F)

I would highly recommend changing over to the DOT 5 Silicone fluid. Cars that I switched over to Silicone in the early 1980s have no issues, and the fluid continues to function well.

DOT 4 brake fluid has a higher boiling point than DOT 3, and is specified by many manufacturers for better braking performance.DOT 3, 4 and 5.1 brake fluid will remove paint, but there are much better paint removers. DOT 5 fluid, Silicone, will not harm paint. If it is accidentally spilled on the paintwork, it will not damage the paint, and can easily be wiped off.

I would imagine surfaces contaminated with brake fluid could be cleaned up successfully before painting.

DOT 5 Silicone brake fluid does have some drawbacks. It is very expensive, much more expensive than DOT 3 and 4. DOT 5 fluid can absorb air bubbles, and these air bubbles take some time to settle out. It can be difficult to bleed the air out when bleeding the brakes. Silicone fluid can not be used on vehicles with anti lock brakes.

I have been wrenching for years, and I have fixed countless cars with damage caused by moisture in contaminated brake fluid. I have had to free frozen pistons, and replace wheel cylinders, calipers and master cylinders due to rust and corrosion. I have also had my brakes fail due to the boiling point of the brake fluid being so low, that the fluid boiled resulting in the total failure of the brake system. Old brake fluid is extremely dangerous, as it can and will cause the brakes to fail without warning.

The ideal time to switch to Silicone fluid is when the rubber parts are all being replaced. Blow the metal lines out with compressed air, assemble the brake system and then flush with Silicone fluid until clean fluid comes out of the bleeder screws.

While somewhat expensive up front, if your car is a long term investment Silicone brake fluid will pay for itself many times over, saving you the cost of perpetual fluid replacement, the cost of repairs due to corrosion of brake components, and the cost of paint repair due to spilled brake fluid.


Please email all inquiries to: Dave
or snail mail
32 Turkey Hill Road
Richmond VT 05477

E-15 Ethanol – Dave’s Garage

By now you have probably been made aware of Ethanol, and the associated problems with it. We have been forced to buy E-10 for a few years now. E-10 is 10% corn based alcohol. E-10 is about 15-20% less efficient than conventional gasoline, resulting in a significant decrease in the miles per gallon. The alcohol in Ethanol is hydroscopic, it absorbs moisture. Once the alcohol absorbs all the moisture it can from the air, it becomes saturated, and the water falls out of suspension. This is called “phase separation.” When this happens, the fuel is useless and must be removed and discarded. This is of particular concern with older cars that have gas tanks vented to the atmosphere. The “shelf life” of Ethanol exposed to the atmosphere is only 3-6 months.

Although Ethanol has less energy in it than conventional gasoline, it actually burns hotter. This is a problem. Modern cars are now burning valves. This problem virtually disappeared with unleaded gas and hardened valves in the 1970s. Imagine my shock when my 2000 Chrysler minivan burned an exhaust valve.

This nasty brew is also very corrosive. Ethanol is a strong solvent. It will rot and destroy rubber components. Many fuel lines, carburetor gaskets, fuel pump diaphragms and gas tank sealers are not comparable with Ethanol. Remember that fuel tank sealer you used when you restored your car? That sealer is probably not Ethanol compatible. Rubber components will rot and be destroyed from the inside out (note picture to right). This damage will not be visible, until the part fails and begins to leak. A fuel line may look fine on the outside, but be rotted on the inside. Ethanol will combine with the dissolved rubber components, forming a gelatinous gunk and gum up the carburetor. Ethanol will also remove paint. Remember the moisture that is being held in suspension in Ethanol? Another nasty consequence of Ethanol is that water being held in suspension will rust metal components very quickly.

Ethanol is ok to use in Flex-Fuel vehicles. If your vehicle is a Flex-Fuel vehicle, you have nothing to worry about. How do you know if you have a Flex-Fuel vehicle? Your vehicle will say “Flex-Fuel on the side, have a yellow gas cap, or will have such identifying information in the owners manual.

How can this situation get any worse? Wait! It does get much worse! The government has decided to up the alcohol in Ethanol another 50%. What’s worse than E-10? E-15!

The government will flat out tell you not to use the mandated E-15 in vehicles manufactured before 2001; but that it is ok to use in Vehicles manufactured AFTER 2001.

However, (according to snopes.com) “several automakers and the American Automobile Association (AAA) have disputed the EPA’s claims, maintaining that E15 could damage fuel lines and void vehicle owners’ warranties in many cars, particularly vehicles manufactured prior to 2012:

Only 12 million of the more than 240 million light-duty vehicles in the United States are approved by manufacturers to use the gasoline, according to AAA. Automotive engineering experts believe that sustained use of the gas, both in newer and older vehicles, could cause accelerated engine wear and failure, fuel-system damage and false “check engine” lights for vehicles not approved by manufacturers to use E15, according to AAA.

The EPA recommends the use of E15 only in flexible-fuel vehicles and those built in 2001 or later, but critics maintain that even if E15 is safe for most or all cars in that class, many vehicles still on the road (up to 45% in some areas) do not fall within that class, and the newness of E15 means that many drivers could end up filling their tanks with the gasoline, not knowing it’s not approved for all vehicles.

“It is clear that millions of Americans are unfamiliar with E15, which means there is a strong possibility that many may improperly fill up using this gasoline and damage their vehicle,” AAA President and CEO Robert Darbelnet said. “Bringing E15 to the market without adequate safeguards does not responsibly meet the needs of consumers.”

BMW, Chrysler, Nissan, Toyota and VW have said their warranties will not cover fuel-related claims caused by E15. Ford, Honda, Kia, Mercedes-Benz and Volvo have said E15 use will void warranties, citing potential corrosive damage to fuel lines, gaskets and other engine components.

The AAA says the sale and use of E15 should be stopped until there is more extensive testing, better pump labels to safeguard consumers and more consumer education about potential hazards.”

Fortunately, Vermont’s congressional delegation are on the right side of this issue. Peter Welch is a vocal opponent of Ethanol; senators Sanders and Leahy have voiced opposition to Ethanol. The Obama administration, however, is actively pushing for E-15.

The only Silver lining in this mess is that the overall demand for gasoline is down, so there is less of a push to go to E-15.


Please email all inquiries to: Dave
or snail mail
32 Turkey Hill Road
Richmond VT 05477

Modern Timing Lights and Six Volt Electrical Systems – Dave’s Garage

This month we have a question from Wendell Noble. It seems his trusty timing light has given its last flash, and he wants to know what modern replacements will work with older six volt electrical systems.

There is no simple answer. Most modern timing lights designed to work with 12 volt systems will actually work on six volts. Some, how-ever, will not. For the ones that won’t, a 12 volt battery or a battery charger will have to be used. Timing lights take power from a battery, but the trip wire feeds from the number one spark plug wire.

I have several timing lights, from a 30 year old Sears timing light, a cheap Harbor Freight timing light and an Actron advance timing light. These timing lights will work on six volts.

My advise would be to take a chance and buy a new timing light and try it. If the battery is near the front of the engine, I would hook up the light with the positive lead going to the positive lead on the battery, and the negative lead going to the negative lead on the battery, and the inductive trip wire hooked up to the number one spark plug wire. Chances are, it will work on six volts. If it does not, then the positive and negative cables will have to be hooked up to a 12V power source, (either an extra battery, a battery charger or a 12 volt booster pack).

I have been impressed with the advance Actron timing light I bought through Amazon. It was inexpensive, and it works well. With this light, you only need to find TDC on the engine. The light has a knob on it to advance or retard the flash. If, for example, the timing specification is 8′ advanced at 2,000 RPM, the knob on the light can be set at 8′ advance, and then when the engine is at 2,000 rpm the timing will be correct when the light flash shows the timing pointer at TDC.

Of course, there is the occasional car that runs worse when timed according to the specifications. I have had to manually advance the timing a little bit at a time until I can hear engine knock, then slightly retard the timing until the engine knock stops.

As they say, timing is everything.


Please email all inquiries to: Dave
or snail mail
32 Turkey Hill Road
Richmond VT 05477

Packing Wheel Bearings – Dave’s Garage

Mechanical things need three things to work and work well. First, they need to be kept clean and dry, second they need to be properly lubricated and third, they need to be properly adjusted.

This advise is especially true of wheel bearings. Oddly, one of the biggest problems with wheel bearings can be caused by OVER lubricating them. The term “packing” wheel bearings has more to do with the application of grease than the quantity of grease.

To properly “pack” wheel bearings, the grease needs to be distributed thoroughly throughout the bearing assembly. The actual amount of grease needed is quite small. If too much grease is “packed” into the bearing and the cavity, this grease will be pushed out when the wheel spins, and could easily ruin the brake shoes. In addition, the wheel bearing could actually overheat.

Repacking wheel bearings is an easy job, and should be part of the routine maintenance of the vehicle. Before you decide to re-pack wheel bearings, make sure you have new grease seals and fresh wheel bearing grease on hand. If you suspect the bearings may need to be replaced, make sure you have them too. Make sure you have the proper parts before disassembly. Several VAE members can tell the story of how I purchased a set of trailer bearings assuming they are all the same size-They are not. Long story short, there are two sizes, and they are only 1/16″ different. By the time I realized this, the auto parts stores were all closed, and we were at the side of the road with the wrong parts.

wheel ball bearing
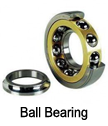
Bad wheel bearings have several tell tale signs of failure. They often make a humming, growling sound at speed. When turned by hand, they often make a “gravely” sound. There should be no axial play in the hub. Front wheel bearings that have failed will make a different sound as the steering wheel is turned. Generally, if the bearing sound goes quieter when you turn the wheel to the left, it is the right bearing, and if it gets quieter when you turn to the right, then it is the left bearing.

Oddly, a lot of newer cars do not have serviceable bearings, the entire hub needs to be replaced. I have noticed that these new hubs have almost no grease in them.

wheel bearing roller bearing
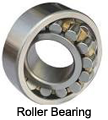
To repack a wheel bearing, first the spindle or axle nut needs to be removed. Often a puller will be needed to remove the hub assembly. If the cones need to be removed, a press will come in handy for removal. The grease seals will almost certainly be destroyed upon removal. The bearings and the hub need to be cleaned and dried. Kerosene and a clean paint brush work well to clean old wheel bearing grease. Once washed clean of grease, all traces of the solvent need to be removed. Soap and hot water work well for a final clean. Traces of solvent will destroy the wheel bearing grease. Once the bearings are clean and dry, they are ready for an inspection and greasing. Inspect the bearings carefully, looks for pits, scoring, rough spots or signs of overheating. Spin the bearing and listen for the tel-tale “gravely” sound. Feel the bearing as it rotates and feel for any binding or rough rotation.

If the bearing is reusable, it is time to pack and reassemble. Cleanliness is super important. Wash your hands and dry well. Take a dab of grease and place it in the palm of your hand. Push the grease through the outer race toward the inner race, getting grease through the rollers or the balls of the bearing. Once all the voids of the bearing are full, rotate the race a bit to evenly distribute the grease. Alternatively, a zip loc bag can be used to force grease through a bearing, or you could also use a bearing packer. I still prefer to do this job by hand.

Take your finger and put a smear of grease on the outer cone. Repeat this procedure for the second bearing in the hub.

Make sure you put a thin smear of grease on the lip of the new seal. The seal goes with the flat side on the outside, and the spring on the inside of the lip should face in. I use a scrap piece of 2 by 4 lumber and a mallet to tap the new seal in place. I have an oil seal installation tool, but I find the 2 by 4 works better.

tapered roller bearing
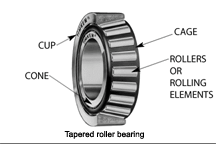
Reassemble the bearing/hub assembly. Do not fill the voids of the hub with extra grease. Once the assembly is together, tighten the spindle or axle nut. If there is a torque specification, torque to spec. If not, and it is a tapered roller bearing spindle, I tighten the nut until the bearing just starts to bind, then back off until I can install a cotter pin. You want to find the “sweet spot” where the wheel is loose, and also not binding at all. Too tight, or too loose and the bearing will soon fail. Feel the hub assembly and check for wob-ble in the bearing. Put the wheel back on and spin it a few times. Check for free noise free rotation, then check for wobble again. Place the dust cover on, and you are all set.

If done properly, the freshly packed wheel bearing should last a long, long time.


Please email all inquiries to: Dave
or snail mail
32 Turkey Hill Road
Richmond VT 05477

Plastic Welder – Dave’s Garage

Most home workshops have some type of welder. Whether it is a simple arc “stick” welder, a wire feed MIG welder, a modern TIG welder or a simple set of Oxygen-Acetylene torches, these tools are invaluable to a “Hands-on” automotive enthusiast.

Today, more and more things are made out of plastics. Inevitably, while working on a project, there will be a need to weld plastic. Unlike metal, plastic can not be electrically welded, as plastic is an insulator, not a conductor.

Like metal, plastic can be thermal-welded.This simply means fusing two similar plastics together with heat.

There are two affordable plastic welders available for the enthusiast. The most inexpensive type, is a hot air jet type. This type simply uses a jet of hot air to melt the welding surface and a plastic welding rod. This type of welder looks like a conventional hand held hair dryer with a metal cone tip at the end.

I have found this type to be particularly tricky to use. It is difficult to modulate the temperature, and the right temperature is critical for a good weld. If the temperature is too hot, the plastic burns, too cold and you cannot get a good bond.

The other option is speed tip welding, or airless welding. This welder looks a lot like a conventional soldering iron, only there is a slot in the tip for the welding rod to be fed into the machine. Speed tip welders have an adjustable heat setting, so the operator can “dial in” the proper temperature for the particular type of plastic.

I have both types of welders. I have used the speed top exclusively for the last several years, with very good results. I have successfully welded plastic interior parts, rubber bumpers, and many other miscellaneous parts.

I have a Urethane Supply welding kit. I bought my welder on Amazon for less than $200.00. It literally paid for itself the first time I fixed a bumper cover. They have much less expensive models starting at about $50.

This welder came with an instruction manual, welding rods and the welder itself, everything needed to begin plastic welding at home.

Like most welding, plastic welding takes a little practice. The right temperature is crucial. Too hot, you burn the plastic, too cold yields a cold weld with little strength.

As with metal welding, you have to use the appropriate plastic welding rod. It takes a little experience to be able to determine which rod to use with which plastics.

This tool turned out to be one of those tools that has proven to be very valuable, I can’t imagine not having it.


Please email all inquiries to: Dave
or snail mail
32 Turkey Hill Road
Richmond VT 05477

Battery Life – Dave’s Garage

Hi Dave. I have a question that may be good for Wheel Tracks as well. Battery life. Since we all have old cars that are not used too much–or not enough is a better description. I am now in a position that 6 car battery’s are over 8 years old. Some still working and others don’t have enough power to crank the starter. That can be a size-able expense that will face me again in about 5 years assuming that is the life expectancy. What options are there for Battery’s besides going new?

There are two real options for buying new. Conventional “wet” batteries, and newer, spiral glass mat gel cell batteries, like the “Optima” battery. If properly maintained, batteries can go strong for eight years or more, while a service life of 3-5 years is more typical. The biggest issues with the conventional “wet” batteries are:

  1. They leak. Battery acid is nasty, and can do considerable damage to the body of the car it is in. Leaking near the terminals can also cause considerable corrosion at the terminals.
  2. Conventional batteries lose energy, about 1% a day. This is made worse if it is a parasitic drain on an installed battery, like radio memory for example.
  3. Conventional batteries do not do well in hot environments, the water in the acid solution will evaporate. Heat is one of the biggest killers of “wet” batteries. It is often said that batteries are fatally damaged in the summer, then fail when the weather gets cold in the fall.
  4. Conventional batteries discharge explosive hydrogen gas, presenting the possibility of an explosion given the right situation.
  5. Conventional batteries must be mounted rigidly, right side up. They can not be tipped or subjected to severe vibration or jarring im-pacts. If tipped, they will leak. If shaken, they will fail structurally inside and could potentially short out. If loose, in addition to being unsafe, they will jounce about causing failure internally.
  6. If not properly charged, conventional batteries will freeze, and be destroyed. A charged battery has a freeze point of -95’F. A discharged battery will freeze at 20’F.

The other option is a glass mat spiral gel cell battery, like the Johnson Controls “Optima” battery. These batteries are significantly more expensive, about $50 more.

Gel cell batteries do not leak. Because they do not have the acid bath construction, they can be mounted in any position, even up-side-down. There is no concern about leaking acid or corrosion on the battery terminals. These batteries also do not discharge hydrogen gas, so there is no issue with venting them. Because there is no issue with evaporation of the electrolyte, they hold up better in very hot environments.

Because of the spiral, fiberglass mat gel cell construction, these batteries hold up very well to vibration and jarring impacts.

AGM batteries discharge at a much lower rate than conventional “wet” batteries. This can be a big plus for a vehicle that spends a considerable amount of time in storage.

The down side of AGM batteries is they are considerably more expensive, and there reliability is spotty. I have had three fail in less than two years. The warranty of the Optima is only a two year replacement warranty, kind of skimpy given the high purchase price in my opinion.

How can they be stored over the winter to maximize life?

Conventional “wet” batteries do well with a battery tender hooked up to them. Battery tenders charge the battery, then provide a “float” charge to maintain a full charge. They will not overcharge the battery. When the vehicle is returned to service, simply unplug the battery tender, and you are good to go. AGM batteries can simply be unhooked and left in the vehicle, they will not discharge.

Do battery’s like “Optima’s” last any longer in rarely used vehicles?

In theory, yes. In reality, that depends. I have had three Optima batteries fail in under two years.

Also, when I check my acid, I am finding particles in the fluid. Is that a sign that the plates are going bad? It actually looks dirty. I’d also guess you’d tell me to wait until spring to buy one. Otherwise it will sit on the shelf for 5 months.

When you check the acid, it should be clear. If it isn’t, there are impurities in it. This could be caused by sulfate on the lead plates, or impurities suspended in the acid. Either way, the battery is no longer good. If the plates are sulfating, the battery will not provide the proper amperage. If there are impurities in the electrolyte, the battery could short internally.

Proper maintenance of the battery includes checking the level of the acid in the individual cells. Only add distiller water. There is a myth that you should add acid. The level drops when the water in the solution evaporates. If you replace the water, you are keeping the concentration correct. The plates should remain under the surface of the acid.

I have learned that buying a new battery that may be “special” and some are, does not mean your getting a fresh battery. It may well have been left on the shelf waiting for me.”

The first thing you should check when purchasing a battery is the manufacture date on the battery. It will give the month and the year of manufacture. The battery should only be a month or two old. Any older, and I would ask for a newer one.

I always load check a battery to check it. I have a carbon pile load tester. It will put a load on the battery, and maintain the load for about ten seconds. There is both an amperage and a voltage gauge on the meter. If either the amperage of the voltage falls during the load test, an alarm sounds, and the needles on the gauges sweep down. If the battery is good, the needles on the gauges hold. Snap-on sells such a tester for about $600. I got mine at Harbor Freight for $50. I’m sure the Snap-on is a much better unit, but mine has worked fine for many years and I have no complaints. The Harbor Freight unit is well made and has good reviews.


Please email all inquiries to: Dave
or snail mail
32 Turkey Hill Road
Richmond VT 05477

“Braking News” or “LED Story” – Dave’s Garage

How many of you are worried about over-taxing the electrical system on your antique car?

How many of you are looking for a way to make the rear lights on your car more visible? Recently I was behind a Cadillac with a LED third brake light and conventional incandescent left and right stop/directional lights. I was struck by how much faster the third brake light illuminated as compared to the conventional incandescent tail lights when the driver hit the brake.

MG TD led brake lightI thought about this when our MG TD burned out yet another brake light switch. The replacement brake light switch lasted about 300 miles before it burned out. The replacement switch just can’t handle the amperage of the incandescent stop lights. The MG does not have a relay in the brake light circuit, or any other circuit for that matter. All the switches in the car handle the full amperage of the circuit. Of course this is true for the stop light switch too.

Another problem with the tiny brake lights on the MG is they are dim, and not very visible. I have almost been rear-ended more than once, and I have even had people yell at me that the lights don’t work, because they could not see them in day light.

So, I have decided that with the lower current draw, quicker illumination, longer life, cooler operating temperature, and most importantly, the brighter light it would make sense to replace the standard incandescent bulbs with modern, plug in LED bulbs.
The old bulb is a clear bulb behind a red lens, so it makes since to get a replacement white led bulb right? WRONG! Science has a nasty way of proving conventional wisdom to be wrong.

Here is the reason that you do not want to use white LEDs behind a colored lens or filter:

  • Unlike tungsten lights, white LED’s ‘trick’ the eye into seeing white. Most White LED bulbs are made using two wavelengths of light, 460 nanometer Blue and 590 nanometer Amber. They are mixed about 70 percent blue and 30 percent amber. Using white LED’s behind a filter (Red or Amber) will actually result in very little light being visible at all. This is because red and amber LEDs are color specific, they only emit one color. Incandescent bulbs and white LEDs produce all colors, which produces a visible white light.If you put a white LED behind a red filter, all of the colors and the light energy required to produce those colors are filtered out, re-sulting in a much dimmer light.Assuming that you are using a white LED behind an amber or red lens, you will lose (in the case of an amber lens, about 70% of the light generated). It is a very counter productive thing to do.This is why they make white, amber and red plug in replacements for standard 1156 and 1157 bulbs.

    The physics behind this is a bit complex. All you need to remember is to use a white LED with a white lens, a red LED with a red lens, and an amber LED with an amber lens. Simple enough, huh?

    LED lights are another great invention that offers a modern, plug in upgrade to the old car hobby. LED lights are much safer, use a fraction of the electricity, run cooler, shine brighter, light up faster and last much longer than conventional incandescent bulbs. By replacing just the rear bulbs, there should still be enough of a load on the circuit to still cause the flasher unit to operate for the directionals.

    LEDs are Light Emitting Diodes. Diodes only allow electricity to travel in one direction. They are like one way valves for electricity. When ordering replacement bulbs you must specify positive or negative ground, and 6 or 12 volts.


  • Please email all inquiries to: Dave
    or snail mail
    32 Turkey Hill Road
    Richmond VT 05477

Six Volt Starter Woes – Dave’s Garage

Dave, The battery is strong & keeps a charge…’the’ starter works well when it is not installed in the car…when (you) install the starter & depress the starter switch (you) get a clunk & then an excessive pow-er draw (all other power will go out, lights, etc.). -Ken

Ken, I suggest load testing the starter, to ensure the current draw was not excessive.

Here is what I did:

1. With the starter out of the car, I used my volt meter and checked to make sure I had power to the “in” connection of my starter switch.I then checked to make sure there was no power at the “out” connection (the connection that goes to the starter). Then I had my wife step on the starter switch, and verified that I had power at the “out” connection. Everything worked fine, as expected. So far, so good.

2. I then installed the starter motor and did the same thing. Had power at the “in” connector of the starter switch, no power at the “out” connector. Then I had my wife step on the starter switch. I lost all power. No power at the “out connector”, no power at the “in” connector either! She would release the starter switch, I again had power at the “In” connection of the starter switch. I have taken the starter out of the car, I will get it load tested. But I am confused about what is happening.- Ken

Ken, It sounds like either the ground side or the hot side has a bad connection, one that breaks when there is a strong load on the circuit. I would check the grounds first. There should be a stout ground from the battery to the frame, and another from the engine to the frame. If there is a strong cable connection from the starter ground to the ground side of the battery, then the next thing to check is the cable from the hot side of the battery to the starter switch. There should be a large cable with a smaller one branching off for the car electrical system. There should be a straight shot with the main cable from the battery to the starter switch.
Keep me posted…

Dave, I bought another battery and two new battery cables. I disconnected the regular battery from the starter and then connected the positive terminal of the new battery directly to the starter switch. Then I connected the negative terminal of the new battery directly to the bolt that holds the starter in place (attached to the engine). The car started just fine. That proves there is nothing wrong with the starter or the starter switch.

The problem is when the car is hooked up to the regular battery. The car was originally set up to have positive ground, and the negative line going to the starter switch and ignition switch. But it apparently was changed at some point, as the positive now goes to the starter switch and ignition switch.

I still don’t understand why I would lose all power (to the starter and to the ignition switch) when the starter switch is pressed (I lose headlights, dash lights – everything). Perhaps the battery is not well grounded to the car.

I finally had some time to work on the Packard today.

As you last remember, when I hooked the starter to a separate battery, it worked fine. But when hooked to the regular battery it would not work (a quick “glug”, then I would lose power to everything – headlights, horn, starter).

Today I hooked up the starter to the old battery, but replaced the cable from the battery to the starter. It was the only “original” cable of the starter circuit of the car. This cable was cloth covered. The other three cables were plastic covered – the original cloth covered cables had been replaced at some point before I got the car. When I bent the cable as I was taking it out, the cloth cover disintegrated.


Please email all inquiries to: Dave
or snail mail
32 Turkey Hill Road
Richmond VT 05477

My 2 Cents on Engine Oil – Dave’s Garage

subaru outback engineRecently, I had to replace the head gaskets on my Subaru Outback. The car had 205,000 miles on it. Outside of replacing the spark plugs, I have not done anything to the engine.

When I took the engine out, I was expecting to find the engine to be tired after going so many miles. I was surprised to find no wear on the engine. The valves were not worn. The cylinders still had the hone marks on the walls. There was no sludge or varnish to be found anywhere. If I did not know the car, I could have been convinced that the engine had very few miles on it.

There has been great discussions recently about the reduction of zinc in modern engine oil due to the zinc harming the catalyst in catalytic converters, and how this was detrimental to older, flat tappet camshafts and lifters.

I was surprised to find that my Subaru does not have roller camshafts, but rather the older style flat tappet camshafts. The car also has a “shim and bucket” style valve lash adjustment. To adjust the valve clearance, shims are added or removed to achieve the proper clearance. After 205,000 miles I gave the valves (all 32 of them) and camshafts (all 4 of them) a close examination. I could find no evidence of any wear, and all was within tolerance. I had everything checked at the machine shop when the heads were planned, and they confirmed that all was as it should be. I did replace the valve guide seals while it was all apart.

So, with an engine in such good condition, why did I have to replace the head gaskets? Well, the heads were both warped and had to be planed .007″. Why were the heads warped? I don’t know. I asked at the machine shop and I was told the Subaru heads just warp. The good news is this was the first H6 engine they have ever worked on. For comparison, they said that they planed a record 26 four-cylinder heads in just one day.

This car has always had Mobil 1 engine oil, and it has only been changed every 10-15 thousand miles. This confirms what I have suspected for years. Modern synthetic engine oil is remarkable, and proven to prevent engine wear. I have been working on engines for over thirty years. I have been inside engines that looked like BBQ grills, I’ve seen thick sludge, and I’ve seen thick brown varnish throughout engines. I have yet to see any evidence of this type of contamination, or significant wear on engines using quality synthetic oil. Modern engine oil has come a long, long way and todays synthetic oil is nothing short of remarkable.


Please email all inquiries to: Dave
or snail mail
32 Turkey Hill Road
Richmond VT 05477