Epoxy Primer – Dave’s Garage

About 10 years ago I discovered epoxy primer. It was recommended for rust repair, and later as a primer for restoration. Epoxy primer seals metal, preventing further oxidation of the bare metal. The problem with conventional primer is that it does not protect from moisture, it is porous and literally absorbs moisture like a sponge.

For rust repair, conventional primer does not provide adequate protection against the further advancement of corrosion. For restoration and body work, epoxy primer is an excellent way to coat and protect bare steel. If while block sanding I sand through the primer back to bare metal, I will apply another coat of epoxy primer over the bare metal to ensure there is a coat of epoxy primer protecting all the bare metal.

I have rust repair work almost ten years old that is still holding up quite well, holding up better than the factory corrosion protection and paint.

For years I have been coating metal with epoxy primer after I have done any hammering and welding. Clean, bare metal is epoxy primed, then all my body work is done OVER the epoxy primer. The primer instruction sheet will provide instructions describing the adhesion window for body filler or subsequent paint of the primer. There is usually a time window of a number of hours before the primer must be sanded and recoated. Filler instructions state that it must be applied to bare metal. I have not had any adhesion problems applying filler over fresh epoxy primer.

Body filler is also porous, and absorbs water. It will cause extensive corrosion if it comes in contact with moisture and is applied over bare metal. This will easily ruin even the best paint job.

Epoxy primer also makes an excellent sealer too. I use reduced epoxy primer as a sealer before applying the color coat. This provides a moisture proof seal against any body work and primer-surfacer, protecting the body work and the metal underneath. Epoxy primer-sealer also prevents those nasty sanding marks from appearing months later. Conventional primer is somewhat plastic, and shrinks and settles for months after being sprayed. Instructions for using the primer as a sealer are included in the instruction sheet.

I have been using PPG paint products for years, and have been impressed with the results. I use PPG DP-40LF Epoxy Primer. It has proven to be quite effective at stopping the further advancement of rust after rust repair, and I have not had any adhesion problems or other failures with this primer.


Please email all inquiries to: Dave
or snail mail
32 Turkey Hill Road
Richmond VT 05477

Safety Wire – Dave’s Garage

Recently, an acquaintance with an MG TD changed his oil. He happened to notice that there were some metal wires in his used engine oil. I suggested he drop his oil pan and have a look to see where the metal came from. It is a good thing he did. The person who rebuilt the engine did a lousy job safety wiring the main and rod bearing caps.

Fortunately, nothing came loose, and his engine did not grenade. Here is a chart showing the proper way to use safety wire. Following this chart and using a little patience and common sense you can properly safety wire your own projects.

safety wire pliers
How to properly tie Safety Wire

Safety wire pliers are available at many tool stores and on Amazon. I buy my safety wire on Amazon, they seem to have the best price.

Speaking of safety, always securely clamp sheet metal when drilling holes. I was making a patch piece today, a piece about the size of an index card. The piece was going to be butt welded on three sides, and spot welded on the fourth side to duplicate the factory sheet metal. I was drilling several 1/4 inch holes every inch or so on one edge for the plug welds. I had the piece of sheet metal on a piece of scrap wood when I was drilling it. I had the drill in my right hand and was holding the metal with my left. The drill bit grabbed the metal and spun it, cutting my hand. I spent the next five hours in the Emergency room getting stitches in my left hand.


Please email all inquiries to: Dave
or snail mail
32 Turkey Hill Road
Richmond VT 05477

Lead… Anyone? – Dave’s Garage

This month we dabble with valves and the myth that we need leaded gas for our older cars designed to run on leaded gasoline. The question comes from our own Wendell Noble with a question about his car.

Dr. Dave, Ever since lead tetraethyl was removed from gasoline, I’ve been unconcerned about what detrimental effects on my old car engine might result. I figure, what the hell, it’s not like I’m entering races with my car. This past fall, I noticed my engine was missing on one cylinder. It turned out I had an obviously burned exhaust valve on number one cylinder. Does this mean I should rethink things and start using a lead substitute additive? Can I blame the lack of lead for my valve problem? At least I learned how to do a valve job. -Wendell

Wendell, the short answer is no, you do not need to add a lead additive, and no, you do not need to rethink anything. When you do the valve job, talk with the machine shop to find the best solution for you. You will need to install modern valves made from hardened steel. You may or may not need to install hardened valve seats. This depends largely on the material the head is made of. The reality is that valve most likely would have burned eventually, even on leaded gas.
Now, lets discuss the whole lead story. First, some history:

In 1919, Dayton Metal Products Co. merged with General Motors. They formed a research division that set out to solve two problems: the need for high compression engines and the insufficient supply of fuel that would run them. On December 9, 1921 chemists led by Charles F. Kettering and his assistants Thomas Midgley and T.A. Boyd added Tetraethyl lead to the fuel in a laboratory engine. The ever present knock, caused by auto-ignition of fuel being compressed past its ignition temperature, was completely silenced. Most all automobiles at the time were subject to this engine knock so the research team was overjoyed. Over time, other manufacturers found that by adding lead to fuel they could significantly improve the octane rating of the gas. This allowed them to produce much cheaper grades of fuel and still maintain the needed octane ratings that a car’s engine required.

Subsequently, it was noticed that valve wear was reduced. Specifically, valve seat recession was reduced. Before leaded gas, exhaust valves would become so hot, they would temporarily micro weld to the valve seat, when the valve opened, this micro weld would open, causing a poor seal, valve seat regression, and eventually a burned valve or valve seat. The addition of lead formed a micro film of lead on the valve seat and valve, largely preventing this from happening.

It is estimated that 5,000 people were dying annually, with many more thousands falling ill due to the effects of lead poisoning.

What does all of this mean to the antique car owner who has a car designed to run with leaded gas? I would suggest continuing to drive the car and adding nothing to the gas. If there is a problem with a burned valve, replace the valves with modern, hardened valves when it is time to do a valve job. The valves on the older engines were prone to failure due to the materials available at the time of manufacture. While the lead did help, it’s effect was marginal at best. Remember, the purpose of the lead was to improve the octane rating of the gas Inexpensively, not to lubricate the valves.

Drive the car, enjoy it. If it needs a valve job, upgrade to modern valves and be done with it.


Please email all inquiries to: Dave
or snail mail
32 Turkey Hill Road
Richmond VT 05477

Why I Like Saabs – Dave’s Garage

Every month I like to take a particular topic pertaining to automotive restoration or maintenance and discuss it. I could not think of a topic to discuss this month, and have not received any questions to answer. I am going to move the column in a different direction this month.

Why I like Saabs

saab 900I have always liked the styling of the classic Saab 900, especially the 3-door hatchback. With a unique, aircraft inspired shape and a nod to safety, comfort and practicality, there was never another car with the look of a C900.

Saab had some unique features, lets take a look at a few of these.
The ignition key in Saabs were mounted in the center console, between the two front seats. The reason for this was that the engineers at Saab felt the ignition key was unsafe mounted next to the steering wheel, and found that a number of people had their knee caps shattered by the ignition key in frontal crashes.

Saab also realized that the locking steering column was potentially dangerous with the unlikely, but possible locking of the steering column while driving. In a Saab, the gear shift has to be in reverse to take the ignition key out. The ignition key also has to be inserted and turned to take the vehicle out of reverse. This was a successful theft deterrent. You know that annoying steering wheel lock cars have? You have to twist the wheel and jiggle the key to get it to unlock sometimes, not in a Saab! No steering wheel locks.

The engines in the c900 were in “backwards” and tilted at a 45′ angle, mounted on top of the transmission with the clutch next to the radiator and the belts and pulleys next to the firewall. The bullet proof Saab in line 2 liter engine is actually a Triumph designed engine. Think TR7. When Saab gave up on two stroke engines, they did not have the resources to tool for a new engine. They were buying engines from Triumph, but had some quality control issues. Again, think TR7. Saab bought the tooling rights to the engine and began to manufacture it in house. Saab later added a 16 valve twin cam head of their own design.

There is a three chain transfer case to bring engine power down to the transmission. The engine was mounted this way for several reasons. First, it delivered exceptional handling, achieving a near perfect 48/52 weight distribution. Second, it delivered outstanding traction. Third, the angle of the engine allowed the hood to slope down sharply creating both excellent visibility and a lower center of gravity. Fourth, the engine was mounted in such a way that it actually dropped down and under the passenger compartment in the event of a massive frontal collision. Lastly, with most front wheel drive cars the eventual clutch replacement is a major operation. Not so on a Saab. A clutch replacement is an easy job, that can be done in less than an hour.

The side doors on the Saab 900 curve inward toward the floorpan at the bottom, resulting in a door opening without the usual rocker panel/sill obstruction. The sunroof motor is mounted in the rear of the car, near the rear door lock where it is easy to service.

The Saab 900 has a curved wrap around windscreen. It makes you appear far more forward in the car than you actually are, and results in amazing visibility, creating the illusion the car was built around the driver. The driver’s side windscreen pillar (A Pillar) is angled so it’s slimmest section faces the driver creating the smallest blind spot I’ve ever seen in a car- yet is reinforced for some of the best rollover protection in it’s day (and probably since). You can also happily mow down large moose with confidence, as the reinforced windshield frame was actually designed to deflect the impact of an adult moose at highway speed.

I love the little things on my Saab that make it practical, the way they thought about things was just incredible, all for driver and occupant safety

  • The green lights in the glovebox and ashtray etc – they’re green so if you open them at night they don’t over expose your eyes which could increase the chance of you having an accident.
  • The vents on the side of the car are to allow a constant movement of air, the center vent always blows cold air to keep the driver alert even when the heater is on as heat makes the driver drowsy

It might seem a little odd to commemorate a vehicle’s air vents, but when they’re as distinctive as those fitted to Saabs then it’s understandable. With square holes and a round adjustment joystick knob, the airstream can literally be pin pointed to precisely where you want it.

The rest of the typical Saab interior was intelligently laid out, the heated seats were comfortable and the dashboard, while novel and unique, was easy to read.

All of the controls were placed in such a way so the driver could easily reach them without taking their eyes off the road.

They’re a solid car, they handle well, they’re comfortable, unique, interest-ing, quirky, intelligently designed, and fun to work on!


Please email all inquiries to: Dave
or snail mail
32 Turkey Hill Road
Richmond VT 05477

Salt in the Wound – Dave’s Garage

Now that Spring has finally gotten a foothold on our Vermont weather, it is time to wash the salt off our cars. Salt is much more corrosive when the temperature is above freezing. The salty, sandy mixture of road treatment debris, combined with the protective layer of mud from mud season is a perfect recipe for corrosion.

It is really important to thoroughly wash the mud, sand and salt off before it can do any more damage. Washing out the wheel wells, rocker panels, door bottoms, joints where panels meet, floor pans and any other place where debris can collect is a tedious job, but one that will avoid costly rust damage.

rustKeep an eye out for cars similar to the car you drive. Look for rusty areas. These are the areas of your car that you need to pay particular attention to. Make sure drain holes in quarter panels, rocker panels, hoods and doors are open and able to drain correctly.

My Subaru is a 2002 with 205,000 miles on it. It has never had any body work done to it. This spring, a patch of rust appeared where the rear quarter panel and the bumper meet. There is a pin hole now, and the corrosion has taken off over the last few weeks. I plan on sand blasting the area, welding new metal in any holes, and epoxy priming the bare metal before painting. Epoxy primer does a excellent job of both adhering to the metal, and preventing further rust.

Rust prevention and repair are both time consuming and expensive, but with the cost of new cars today, it is money well spent.


Please email all inquiries to: Dave
or snail mail
32 Turkey Hill Road
Richmond VT 05477

Keeping Your Car in Line – Dave’s Garage

Wheel alignments are one of those preventative maintenance items that is often put off for too long. Several months ago I was driving my Subaru in a freezing rain storm. I was shocked at how poorly the car was handling. The back of the car kept side stepping requiring almost constant correction to keep the car from skid-ding out of control. Several weeks later while parked in a hotel parking garage in Connecticut I noticed the inside of the rear wheels was very worn.

I made an appointment to get a four wheel alignment. When they brought the car in and put it on the lift, they showed me that the inside of the rear tires was so worn the steel belts were showing through the tread. They asked me if the car had recently had body or sus-pension work done. Nope. The car has never had any body work, body damage or rear suspen-sion work, ever in 11 years and 202,000 miles. How far out of alignment was the car? The front was within spec., however the rear wheels were towed out (pigeon toed) two full inches. The spec. is for the wheels to toe in .002″.

I am at a loss to explain how the wheels “migrated” so far out of specification, or just when it happened. The signs were all there. I noticed that the tread wear was uneven, or “cupped.” The tires were making more tire noise than normal. The car was not tracking well, and was outright unsafe on slippery roads. Rather than having the alignment checked, I continued to drive for months.

The alignment shop charges $69.00 for a four wheel alignment, and they said they usually take about 20 minutes. Being 11 years old all of the alignment bolts on my car were frozen. They worked on the car for a full two and a half hours to free the bolts up and align the rear wheels. They said because of the extra time, they had to charge me a little extra. How much? An extra $10, for an out the door cost of $79.00. (I’d recommend this shop in a second if anybody is interested).

Had I taken care of this when I first noticed it, that would have been the total cost. Unfortunately, I waited too long, and now I need to buy a new set of snow tires. I could have easily gotten one more season out of these tires if the alignment were not so far off. Lesson learned.


Please email all inquiries to: Dave
or snail mail
32 Turkey Hill Road
Richmond VT 05477

Waterless Coolant – Dave’s Garage

Waterless Coolant?
I have been seeing reference to a waterless coolant lately. I read a column written by Jay Leno in which he touts the advantages to waterless coolant. After doing a little research, I have come to the conclusion that the invention of waterless coolant is another advantage we in the old car hobby can take advantage of, much like modern engine oil and silicone brake fluid.

Ok, what is waterless coolant? Conventional coolant is a 50/50 mixture of ethylene glycol and water with either supplemental coolant ad-ditives (SACs) or long-life organic acid technology (OAT) additives. To keep the coolant operating properly and to protect engine parts, the additives must be checked and maintained periodically. The coolant breaks down over time, and must be flushed and replaced. Failure to maintain conventional coolant will result in both failure to cool the engine, as well as corrosion to engine and cooling system components. Ethylene glycol is also highly toxic. Three tablespoons is a lethal dose. Every year thousands of animals die after consuming conventional coolant, being attracted to the sweet smell.

Glycol-based waterless coolant has recently gained popularity as a maintenance-free alternative to traditional coolants. Brought to market about a decade ago, the waterless coolant provides adequate lubrication for water pumps. Because no water is in the coolant, there’s no need to use additives to protect engines from water’s deleterious effects.

Traditional vs. waterless coolant…

Water is an excellent heat-transfer medium when liquid, but it changes state. When it boils at 212° F, it creates vapor pockets that can insu-late and hold heat in the metal rather than transferring heat away. When below 32° F, water freezes, expanding to generate enough pressure to crack engine blocks.

Freezing/boiling levels…

Traditional, fully formulated coolants prevent freezing to -34° F. It also raises the boiling point to 224°. Since engines operate at close to water’s boiling point, the glycol adds a safety margin to prevent boil-over. Additional margin is provided by pressurizing the closed cooling system to 1 atmosphere (15 psi) above ambient. With the pressure cap, water boils at 250° and 50/50 coolant boils at 263°.
Waterless coolant, however, won’t freeze below 40° F and boils at above 375° — even without pressurization — giving a huge safety mar-gin. Water carries scale-forming minerals, so waterless coolant prevents scale buildup. It doesn’t need a 15-psi radiator cap — the manufacturer recommends 1 to 2 psi, just enough to close the system. With no water to boil off, localized hot spots and mineral deposits are avoided.

Engine protection…

Pitting is caused when water vapor bubbles form next to cylinder liners as they flex from the side thrust of pistons. When the bubbles im-plode, coolant impacts the outer walls of the liners with enough force to drill through. That lets coolant into cylinders and the oil sump.

In traditional coolants, supplemental additives form a protective coating that absorbs most of the impinging force. Without the protection, repeated implosions drill holes in the steel liners. Also, organic acids in long-life coolants protect from pitting. Protection levels must be moni-tored.
With waterless coolant, no water vaporizes and no bubbles form as the liners flex. Waterless coolant prevents voids. Since water is a corro-sive agent, waterless coolant also resists corrosion.

Damage caused by corrosion from coolant can be very expensive to fix, or could even ruin an engine.

Safety…

The antifreeze in Evans’ coolant is mostly propylene glycol, not ethylene glycol found in conventional coolants. Unlike ethylene glycol, propylene glycol is nontoxic. In fact, pure propylene glycol is used as a sweetener in many medications. If propylene glycol leaks and is in-gested, no harm is done.

The drawbacks of waterless…

Availability. You may be able to limp home on a slow leak, but if something catastrophic like a burst radiator happens, you can’t just repair it and replace with ordinary coolant. You need to find a service provider that carries Evans’ coolant. If you just add water, you lose all the bene-fits of your expensive changeover.

Expense…

Evans coolant is not cheap, it costs upwards of $40/gallon, roughly twice the price of $15 – $20/gallon for traditional coolant. I have seen it available on line for less.

For a collector car that will be maintained indefinitely, waterless coolant makes sense. It is expensive, but will pay for itself over the long haul. Skipping the chore of flushing and replacing the coolant every few years (everybody reading this does this, right?) and avoiding the costly effects of corrosion in the engine make this product save money overall. There is also the added benefit of it being non toxic, potential-ly saving a life should the coolant escape the cooling system.

An engine rebuild can easily reach costs of $4,000 or more. Waterless coolant is a cost effective means to protect your investment.

More information can be found at the Evans website: http://www.evanscooling.com/


Please email all inquiries to: Dave
or snail mail
32 Turkey Hill Road
Richmond VT 05477

I’m Going To Make It After All – Dave’s Garage

Recently I went through the annual exercise of getting my old work truck ready for the state inspection. The parking brake did not work. The piece that connects the front and intermediate cables had broken. This is the part that allows for adjustment to take up slack in the cable. It is a simple piece of metal that has a 5/16″ hole on one end to accept the threaded end of the front cable, and a slot at the other end to trap the ball at the front end of the intermediate cable.

Unfortunately, after checking at the dealer and auto parts stores I learned this part is not available anymore.

A check of the local wrecking yards revealed parts no better than the broken part I already had. Frustration led to despair. I realized that this part was manufactured once, so, it could be again. After a little thought I realized I could easily make one.

parking brake fix
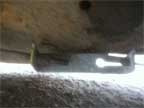
I took a piece of scrap steel, 3/16″ by 1-1/4″ and cut it to a length of 8″. Next I drilled a 5/16″ hole about an inch and a half from one end, placed it in the vise and bent the end over 90°. This gave me the end for the threaded rod on the front cable.

For the other end that accepts the ball on the end of the intermediate cable, I drilled a 1/4″ hole about 2-1/2″ inches from the end, then drilled a 3/16″ hole about an inch from the end.

I placed the part back in the vise and bent a 3/4″ tab over the other end. I removed the piece from the vise and placed it in my metal chop saw, then made a cut connecting the two holes I had just drilled. This gave me the slot to place the intermediate cable in.

Final cost? One piece of scrap metal and about 10 minutes of time. Often when working on older vehicles we have to manufacture our own parts. Fortunately, with a little time and effort, this is possible.


Please email all inquiries to: Dave
or snail mail
32 Turkey Hill Road
Richmond VT 05477

“Alternative” Preventative Maintenance – Dave’s Garage

I recently embarked on the task of winterizing my vehicles. I realized that my Subaru still has the original alternator, and it has 195,000 miles on it. I have never had an alternator last this long. When I brought the car in for an inspection, I asked the guy how often they replaced alternators on Subarus. He said they replace a few. I asked him how many miles do they last. He told me they can go at anywhere between 80,000 and 150-160,000. Hum. I called Auto Electric in Williston and asked them how long this particular alternator lasts. They said they seem to last between 100,000 and 150,000 miles. I asked what wears out, and they said the basic wear items- brushes and bearings, but the rest of the alternator holds up well. I asked what it would cost to recondition a working alternator and was quoted between $50 and $80.

I priced remanufactured alternators and saw prices starting in the range of $150.00 and quickly going up well past $200.00 (not including the core charge).

I removed the alternator and decided to bring it in. The first thing I noticed is that when I spun the pulley, the bearings sounded rough. Auto Electric replaced the bearings, brushes and the regulator. The brushes were almost completely gone, and the bearings made noise. Final cost was $80, or less than half what it would have cost to buy a re-manufactured alternator. This remedy also avoided a potential road side break down and unplanned down time.

Penetrating fluid update:

Recently I recommended a mixture of acetone and ATF as an alternate penetrating oil, and I stated that I would try it and report back with my findings. I have done a lot of work recently, work involving removing very rusted nuts and bolts, pressing out frozen bearings, freeing heavily rusted frozen parking brakes, and removing brake bleeder nipples and hydraulic fittings.

I am happy to report that this home brewed concoction has worked very well, exceeding my expectations. The only down side is that the ATF and acetone do not like to remain in suspension, so I have to shake my oil can before each use. The fluid needs to be kept in a sealed container, as acetone evaporates quickly.

I hope you try it, and have as much success as I have had.


Please email all inquiries to: Dave
or snail mail
32 Turkey Hill Road
Richmond VT 05477

Rubber Fuel Lines and Ethanol – Dave’s Garage

I have heard of people having problems with collapsed fuel lines due to attack by ethanol. Although most of my fuel line is metal, there has to be a short section of flexible line between the body and the carburetor. Is there any specific material you know of that is impervious to ethanol? When I asked that question at my local parts store, he first gave me a blank stare, then asked what kind of car it was for. When I told him it was for a ’29 Plymouth, I got another blank stare. Then he said he didn’t know of anything and suggested I use non-ethanol gas. That’s pretty consistent with your last column. -Wendell Noble

First, the good news:
Fuel line today is made of neoprene, not rubber. It is impervious to the alcohol in E10 ethanol. I usually use fuel injection hose, not fuel line because it is much more substantial. This is available in auto parts stores in 1/4″, 5/16″ and 3/8″. If you really want to be sure, you can use marine fuel line. This stuff will holdup to E85 and bio diesel. Marine fuel hose can be purchased from marine supply stores.

I would remove a section of the flexible hose and bring it to the auto parts store. The old rubber fuel hose will dissolve with the E10 ethanol we are stuck with today. Replacing the old rubber hose with new neoprene is cheap, easy and makes the car much safer and more reliable.


Please email all inquiries to: Dave
or snail mail
32 Turkey Hill Road
Richmond VT 05477