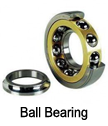
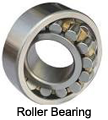
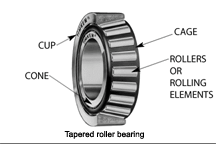
Mechanical things need three things to work and work well. First, they need to be kept clean and dry, second they need to be properly lubricated and third, they need to be properly adjusted.
This advise is especially true of wheel bearings. Oddly, one of the biggest problems with wheel bearings can be caused by OVER lubricating them. The term “packing” wheel bearings has more to do with the application of grease than the quantity of grease.
To properly “pack” wheel bearings, the grease needs to be distributed thoroughly throughout the bearing assembly. The actual amount of grease needed is quite small. If too much grease is “packed” into the bearing and the cavity, this grease will be pushed out when the wheel spins, and could easily ruin the brake shoes. In addition, the wheel bearing could actually overheat.
Repacking wheel bearings is an easy job, and should be part of the routine maintenance of the vehicle. Before you decide to re-pack wheel bearings, make sure you have new grease seals and fresh wheel bearing grease on hand. If you suspect the bearings may need to be replaced, make sure you have them too. Make sure you have the proper parts before disassembly. Several VAE members can tell the story of how I purchased a set of trailer bearings assuming they are all the same size-They are not. Long story short, there are two sizes, and they are only 1/16″ different. By the time I realized this, the auto parts stores were all closed, and we were at the side of the road with the wrong parts.
 Bad wheel bearings have several tell tale signs of failure. They often make a humming, growling sound at speed. When turned by hand, they often make a “gravely” sound. There should be no axial play in the hub. Front wheel bearings that have failed will make a different sound as the steering wheel is turned. Generally, if the bearing sound goes quieter when you turn the wheel to the left, it is the right bearing, and if it gets quieter when you turn to the right, then it is the left bearing.
Oddly, a lot of newer cars do not have serviceable bearings, the entire hub needs to be replaced. I have noticed that these new hubs have almost no grease in them.
 To repack a wheel bearing, first the spindle or axle nut needs to be removed. Often a puller will be needed to remove the hub assembly. If the cones need to be removed, a press will come in handy for removal. The grease seals will almost certainly be destroyed upon removal. The bearings and the hub need to be cleaned and dried. Kerosene and a clean paint brush work well to clean old wheel bearing grease. Once washed clean of grease, all traces of the solvent need to be removed. Soap and hot water work well for a final clean. Traces of solvent will destroy the wheel bearing grease. Once the bearings are clean and dry, they are ready for an inspection and greasing. Inspect the bearings carefully, looks for pits, scoring, rough spots or signs of overheating. Spin the bearing and listen for the tel-tale “gravely” sound. Feel the bearing as it rotates and feel for any binding or rough rotation.
If the bearing is reusable, it is time to pack and reassemble. Cleanliness is super important. Wash your hands and dry well. Take a dab of grease and place it in the palm of your hand. Push the grease through the outer race toward the inner race, getting grease through the rollers or the balls of the bearing. Once all the voids of the bearing are full, rotate the race a bit to evenly distribute the grease. Alternatively, a zip loc bag can be used to force grease through a bearing, or you could also use a bearing packer. I still prefer to do this job by hand.
Take your finger and put a smear of grease on the outer cone. Repeat this procedure for the second bearing in the hub.
Make sure you put a thin smear of grease on the lip of the new seal. The seal goes with the flat side on the outside, and the spring on the inside of the lip should face in. I use a scrap piece of 2 by 4 lumber and a mallet to tap the new seal in place. I have an oil seal installation tool, but I find the 2 by 4 works better.
 Reassemble the bearing/hub assembly. Do not fill the voids of the hub with extra grease. Once the assembly is together, tighten the spindle or axle nut. If there is a torque specification, torque to spec. If not, and it is a tapered roller bearing spindle, I tighten the nut until the bearing just starts to bind, then back off until I can install a cotter pin. You want to find the “sweet spot” where the wheel is loose, and also not binding at all. Too tight, or too loose and the bearing will soon fail. Feel the hub assembly and check for wob-ble in the bearing. Put the wheel back on and spin it a few times. Check for free noise free rotation, then check for wobble again. Place the dust cover on, and you are all set.
If done properly, the freshly packed wheel bearing should last a long, long time.
 Please email all inquiries to: Dave
or snail mail
32 Turkey Hill Road
Richmond VT 05477

Leave a Reply