Zip-Zip, New Line

I recently discovered a neat trick to help form new hard brake lines. I am a huge fan of nickel copper tubing; it is very easy to form and lasts forever. I have found that it makes sense to leave a little more material on the end of the line when making flares, as the nickel copper compresses more than steel does.

When replacing a hard line with a new line, it is a lot easier to make all the turns and bends by zip tying the new line to the old one as you form it. Place several zip ties at the end, leaving enough room for the fittings, then add zip ties as twists and turns are formed. This method still leaves enough room to use tubing benders to form correct turns without pinching the line. When the new line is formed, just snip the zip ties off, add the fittings and make the flares on the ends. Your new line will match the length and shape of the old line.

Using this method, the new line should easily take the place of the old line and fit in the proper clamps and holders.

Over Bearing

I recently changed one of the rear wheel bearings in my 2016 Outback. This is fairly typical, as the car just passed 50,000 miles, and this is a common problem with Subaru’s. I have changed many rear wheel bearings on Subaru’s. I can usually do the job in less than an hour. 

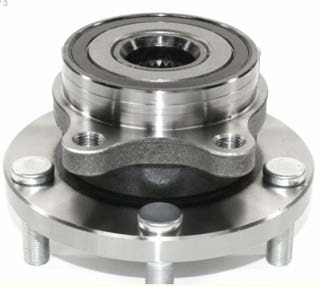
The Subaru does not have a serviceable bearing, the whole hub needs to be replaced. The hub bolts on to the spindle with four bolts. The process of replacing the bearing use to involve removing the axle shaft, then removing the four bolts, and the hub simply comes off. 

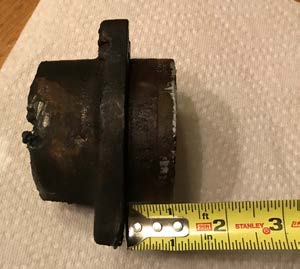
For some reason, Subaru redesigned the hub assembly in 2015. The new hub design retains the four mounting bolts, but the assembly is pressed in to the spindle with a flange that presses in to the hub. This flange is over an inch long. 

I took the axle nut off, and easily removed the four hub mounting bolts. To my surprise, the hub would not come off the spindle. I used a big slide hammer, and even heated up the spindle assembly. After struggling for hours, I ended up removing the spindle and pressing the hub out on the press. Fortunately, I was able to remove the spindle without damaging the rubber boots on the links or the ABS wheel speed sensor. I have a 20 ton press, and it was all I could do to remove the hub assembly. The new hub assembly had to be pressed in to the spindle. 

I noticed the rear brake pads were almost worn out while I was working on the wheel bearing. This was my first introduction to electric parking brakes, and how to reset the caliper to replace brake pads. That will be discussed in a fu-ture column. 

I can not understand why Subaru changed the design of the bearing. The spindle was also redesigned. The spindle is mounted to the car with conventional ball joints, and the links have conven-tional tie rod ends. The rear spindle looks like it is mounted on the front, not the rear. When these cars get some years of use, the chances of the ball joints and tie rod end link assemblies coming off easily will dwindle signifi-cantly. A simple rear wheel bearing replacement will likely result in having to replace the links, ABS wheel speed sensor, backing plate, and the spindle in addition to the hub assembly. The job could easily take 2-3 hours and cost well over $500 in parts. 

This is a classic case of newer cars not having serviceable parts, and an unbelievable amount of labor to replace wear items. 

I’d rather work on my 20 year old Outback. 

Fix Your Old Starter

Guest W. Jones this month shows you how to….. 

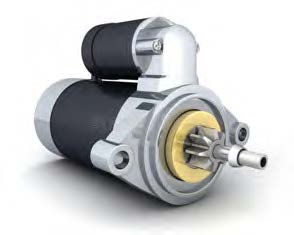
The starter motor is heavy, sturdy and unlikely to get much attention, but a faulty one will be a real headache. Often located in the depths of the engine bay, making it hard to access even in a workshop, it’s not the sort of component that you want to be trying to remove and dismantle at the roadside. There are two types of starter motors: inertia and pre-engaged. Inertia units are common to most 1960s (and earlier) classics, and work by spinning a Bendix gear that drives itself up the main shaft and engages with the ring gear. If it doesn’t engage, you’ll hear a distinctive metallic grating sound – it cranks the ring gear around. As the engine fires, the excess speed forces the Bendix gear out and a spring re-turns it home. 

Pre-engaged starters are more sophisticated, with a solenoid that pushes the Bendix to engage with the ring gear, before another solenoid supplies power to the starter and gets it to turn over. We’re focusing on the inertia version here, but the procedure is largely similar for either variant. With a tear-down, a cleaning and inspection, plus a fresh set of bushings and brushes, your starter should be good to crank away for years to come. 

First take off the brush cover plate and pry the brush spring clips from their posts in the brush cage. Two brushes will be connected to the backplate and another pair to the coil windings. Undo the nuts from the electrical connection tower and make a note of any insulator collars for reassembly. 

Remove the two long bolts on the rear of the starter and both cover plates and casing should come away from the arma-ture, which will be secured to the front plate. Be sure to mark with a prick punch for reassembly. Take it apart carefully and make a note of the number and location of any shims, thrust washers or nylon collars that come out with the shaft. 

Compress the Bendix spring using grips and pry out the retaining circlip and locating pin. The assembly should slide off, but may have a Woodruff key that can fall out. Note the order of assembly for later. The armature should now be removable through the front plate. Thoroughly clean off any grease. 

Inspect the condition of the insulation on the coil windings, which should be intact and free from moisture or corrosion. A specialist can re-varnish the windings if needed. The pole shoes around the coil should be clean and rust-free, and can be bead-blasted, but take care not to damage the windings. 

If there’s any movement between the armature shaft and the bushings, then the latter need to be replaced. Carefully drive out the old bushings with a socket that’s roughly the same size. Soak the new ones in oil for 24 hours before gently pressing them in with a vice. Ensure that the shaft spins freely in the new bushings. 

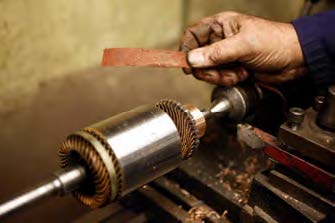
Using emery paper, clean the surface of both the winding ‘pack’ (the shiny steel area towards the center of image left) and the commutator ring (to the right). Spinning them in a lathe is best, but be careful not to take off more than light surface corrosion. Clear the end casings of any grease or oil. 

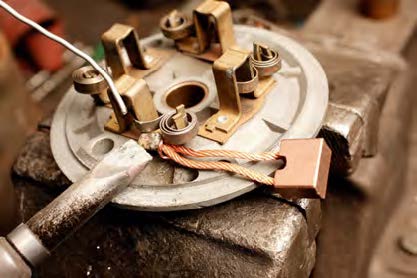
Brushes often have a maximum wear mark, typically about 1/3 inch deep. They need to be unsoldered from the terminal post, with the brushes often paired. They’re identical, but ‘earth’ brushes usually go on the end casing and don’t need to be insulated, while the ‘field’ coil brushes are on the main casing. 

Carefully inspect the Bendix gear. It’s a wearable item (made from mild steel, unlike the hardened flywheel ring gear), but the teeth should all be intact. You can clean worn edges on a grinder, but replacement is best. 

The Dymaxion Car

From Dave’s guest this month, Don Tenerowicz 

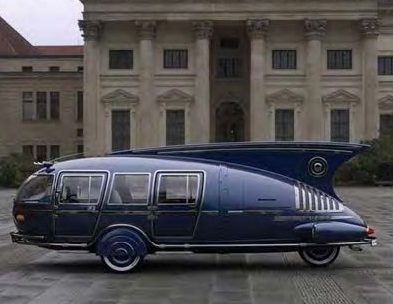
The Dymaxion car was designed by American inventor Buckminster Fuller during the Great Depression and featured prominently at Chicago’s 1933/1934 World’s Fair. Fuller built three experimental prototypes with naval architect Starling Burgess – using donated money, as well as a family inheritance. This was the ground-taxiing phase of a vehicle that might one day be designed to fly, land and drive. 

The Dymaxion’s aerodynamic bodywork was designed for increased fuel efficiency and top speed Its platform featured a lightweight hinged chassis, rear-mounted V8 engine, front-wheel drive, and three wheels. With steering via its third wheel at the rear (capable of 90° steering lock), the vehicle could steer itself in a tight circle, often causing a sensation. 

Fuller noted severe limitations in its handling, especially at high speed or in high wind, due to its rear-wheel steering (highly unsuitable for anything but low speeds) The limited understanding of the effects of lift and turbulence on automobile bodies in that era, allowing only trained staff to drive the car. Shortly after its launch, a prototype crashed after being hit by another car, killing the Dymaxion’s driver. Subsequent investigations exonerated the prototype. 

Despite courting publicity and the interest of auto manufacturers, Fuller used his inheritance to finish the second and third prototypes, selling all three, and dissolving Dymaxion Corporation. One of the three original prototypes survives, and two semi-faithful replicas have recently been constructed. 

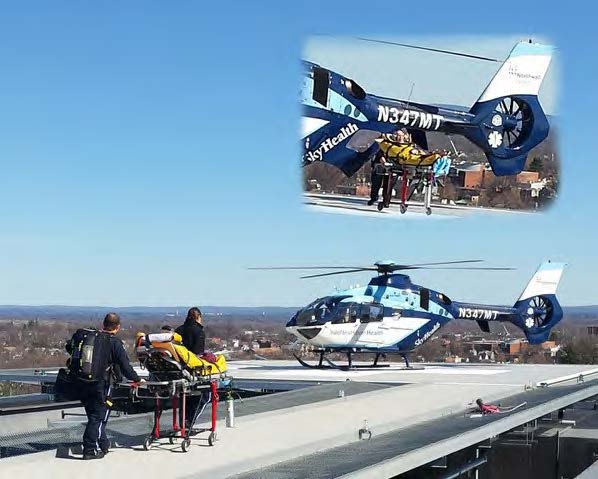
Editor’s note….. Don Tenerowicz also sends Wheel Tracks the “Trivia Column” each month that appears on page 14. He recently sent this short message along with the photo to the right….. 

“I am enjoying life after successful heart surgery. (I was) Transported by Sky Health from St Francis Hospital in Hartford CT to North Shore University Hospital in Manhasset, LI, NY.” 

It has been a little while since he had his helicopter ride. He is doing fine today, like he says, he enjoys life a bit more now. It’s a heck of a way of getting a ride on this big beautiful flying machine!! 

One Hand on the Lever

Shift Fork

This month’s question comes from Wendell Noble. Anyone who knows Wendell and Mary know they have a preference for manual transmissions. Wendell asked me if I knew why his owner’s manual advises not to keep a hand on the gear shift lever while driving. 

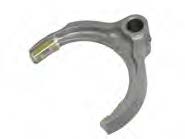
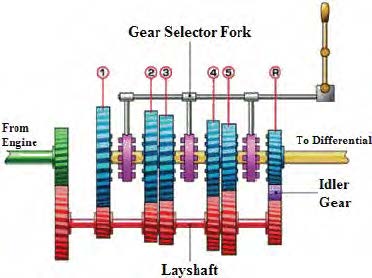
The answer is, yes, I know. The gear shift lever is connected to the shifting forks inside the transmission via a mechanical linkage. The shifting fork slides an engage-ment dog to lock the gears together when you shift. The en-gagement dog spins with the gears, the shifting fork remains stationary. When the operator rests his hand on the gear shift lever, some force is transmitted through the linkage to the shifting fork. This force creates friction between the shift fork and the engagement dog, causing wear. 

Often, when a vehicle gets some age and use, the transmission linkage can develop a rattle. This can sometimes be silenced by holding the gearshift. This often is the genesis of a long lasting bad habit of resting a hand on the gearshift lever. To fix a rattle, the linkage can usually be repaired, either by tightening loose hardware, or replacing worn bushings. 

Dave has a guest this month…

Paul Baresel from Buxton, Maine 

I have never not known a car enthusiast pass by an old barn, or even a collapsing old barn, and ask themselves “What old car or car parts are hiding in there?”. 

My big break came for me this summer after day dreaming what buried treasures are waiting for daylight in this big barn down the road from where I live. I had watched a huge wagon beside the barn disintegrate before my eyes, trees collapse on an old van, and a farm tractor sink into the earth. The day came when I was driving by and saw a door open to the barn and an elderly man dragging some old wood boards outside. I seized the opportunity and introduced myself to him and asked if there were any old car parts inside. I waited with bated breath and “Yes” he said, “but you can not see it!”. “Why not?” “ Just look in the barn” he said. So I did. I thought the term hoarder was the name of a tv show, and here it is in real life. My eyes beheld boards of all shapes and sizes, tables, chairs, books, ancient televisions, refrigerators, and stoves. I asked him “There are car parts in there??!!!” 

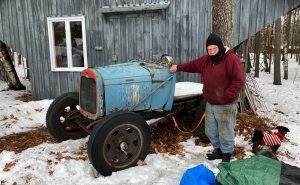
The old gent told me that, somewhere in there was a 1930 Model A doodle bug that was put there 30 years earlier. 

1931 ford model a doodle bug

The gentleman was an actor and his life has been spent in a Portland, (ME) theater. When the theater burned down, many years earlier, he had asked if he could salvage the items that remained. The barn contained all that he had rescued and now he had the task of cleaning it out, because it had been sold. 

He was so sentimental about the theater, that he had rented storage units and planned to move the barn contents into the units. I offered to help in exchange for the Model A and he agreed. 

After a lot of work we uncovered the doodle bug. There it stood gleaming like the Holy Grail, flat tires, broken steering wheel, and broken head lights. It was love at first sight. 

The ultimate challenge was how to get the thing out of the barn. He had built walls around it to hold all of his junk! 

The day came when a friend, the gent, and I began the job of getting the doodle bug out of the barn. The tires held air, we got the transmission free, and the brakes were not frozen. So far, so good until I pushed from behind the bug. 

The ground caved in under my feet, the back wheels began to settle into the cavern. I found my self standing in two feet of porcupine crap! I knew that they would destroy wood, but tunnel? This was a new experience for the three of us. 

We tried to moved the truck again and the front wheels joined the rear wheels sinking into the porcupine tunnels and poop. Using jacks, old boards, and big crow bar, we finally had the vehicle outside for its first day-light in 30 years. 

We had gone through a dozen or so face masks, a container of hand sanitizer and two 6 packs of beer. 

Local people who had heard of the barn commotion, came by just as we pushed the buried “Treasure of Buxton”, on my car trailer. They looked inside the barn with a disappointment. They too, had wondered about the mysteries of the old barn and found only porcupine poop, the junk and this old “jitterbug” (the local term for a doodle bug). I was not allowed in the house until I showered with rubbing alcohol and hydrogen peroxide. I even had to burn the clothes I was wearing! 

Several local people came by my home to stare at the golden radiance of the truck. One comment…..“I always wanted to know what was in that barn?” The look of disappointment and disbelief was amazing, as they left shaking their heads. I was thinking of charging people to gaze upon the “Treasure of Buxton” to recoup my efforts. 

The “ Treasure of Buxton” is sleeping, awaiting Spring to start its engine. 

My stud welder/slide hammer

Happy New Year! Although 2021 will have many challenges, I truly hope we will all have a better year. 

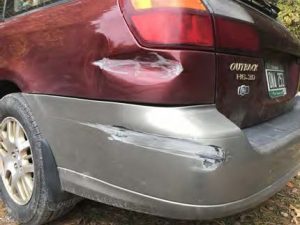
subaru bumper repair

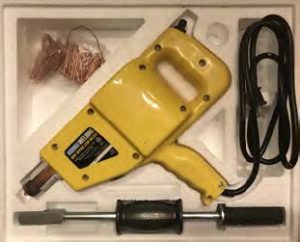
Absent any questions this month, I decided I would write a review for a very affordable and useful tool. I purchased a stud welder/slide hammer from Harbor Freight. This tool allows me to pull dents out, especially handy with blind dents, with no access from behind. 

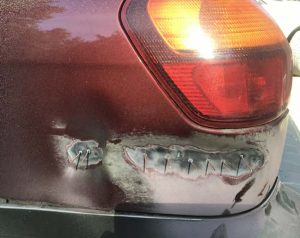
While very handy for blind access dents, it is also handy for dent repair that will require repaint anyway. 

subaru bumper repair tool

I tried this tool out to repair damage to my Outback after it hit a guard rail (I was not driving…). I was very impressed with how strong the weld from the studs is, and how easy it was to pull the metal back with the slide hammer. I am also overly impressed with the quality of the welder. The slide hammer is not extremely high quality, but it works. I would love to have a blow molded case to hold this tool, but I guess that is too much to ask for at this price. I will probably buy a tool case from Harbor Freight to keep it in. 

slide hammer

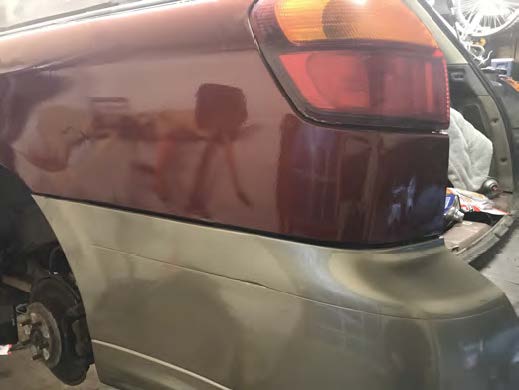
I moved the slide hammer from stud to stud, until the panel was where I wanted it to be, when I was satisfied, I snipped the studs off and ground the welds away with a flap disk on my angle grinder. A skim coat of body filler, followed by filler primer, epoxy sealer, base coat and clear coat and it was done. 

I was able to fix the bumper with two-part epoxy, flexible filler primer, base and clear. The best part of this tool is that it is an affordable $100. I would consider that a bargain. 

subaru bumper dent fixed

Battery Disconnect

Dave! 

Hope you enjoyed your vacation? Did you go anywhere fun? Did you find anything that interested you, or your family? 

Hey, I need some help, please? I just bought a low profile “sliding” battery disconnect, which will mount to the negative terminal of my antique car’s battery (6v). It seems apparent to me that when the switch is “open” (slide not making contact with the receptor) the battery will be disconnected from the circuit and the car will not start…which is great! Obviously, when the switch “closes” the circuit, juice will again flow, and the car will be able to start – Great! 

My question is what about when I “trickle charge” my battery between tours, or while in semi active storage…Is the circuit to be closed with slide making contact? or open & slide making no contact? 

Thanks, I wanna avoid fires, problems, while still ensuring that the battery is fully charged. Maybe its easier and safer to remove the disconnect apparatus entirely, and then charge the battery as normal? 

Chris Chartier, Ascutney, VT 

Chris, good questions! A battery disconnect is a great idea. Many older cars have wiring that is not fused. This, coupled with old lacquer braided wiring is a recipe for disaster. 

Cars should have the battery disconnected when in storage, for safety. There are many battery disconnect switches. I have seen many of the cheaper ones fail. Ideally you want to be able to disconnect the battery from the drivers seat, in the event of a short while driving. 

With conventional lead acid batteries it is a great idea to have the battery hooked up to a battery tender while the vehicle is in storage. Conventional batteries lose about 1-2% of their charge every day. 

If the battery is a gel cell or AGM battery, the best thing to do is leave the battery disconnected. These batteries lose a minimal amount of power while in storage. 

How-to Lubricate Window Slide & Door Locks

had a question recently that may be of interest. The question was: “How do I lubricate my window slides and door lock hardware in my antique cars?”

fluid film

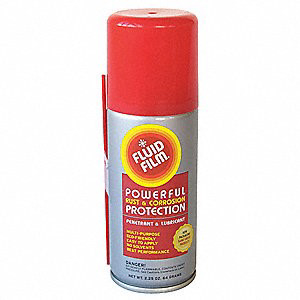
I use Fluidfilm to lubricate window regulators and the latch on the inside of the door. I undercoat my cars with Fluidfilm in the fall, and keep a five gallon pail in the garage for little projects. I keep a paint brush in the bucket, and use it to apply. Fluidfilm works well as a lubricant, does not wash off, and does not attract dirt.

The 2020 Golden Wrench Award

Dave’s Garage is giving space this month to the 2020 Golden Wrench Award Recipients. Congratulations to you all. 

The Vermont Automobile Enthusiasts 

Golden Wrench Award 

May 29, 2020 

(Address & student name……..) 

Congratulations! You have been selected to receive VAE’s Golden Wrench Award. We have found you best exemplify the qualities of the positive attitude toward learning and a drive to succeed in a career in automotive technology or any career that you choose. 

The Vermont Automobile Enthusiasts is an antique and classic car club dedicated to the preservation, protection, promotion and appreciation of automobile history and technology. The VAE is based in Vermont with members from ten States, Canada, Europe and China. 

Your award has come from our belief in the importance of education and continued learning. You are part of a very special group of Vermont high school juniors. You are one of sixteen outstanding students being recognized this Spring, from each of Vermont’s sixteen career centers. Our hope is that recognizing you in your junior year, will energize you to use your last year as a senior, to focus on your future. We have learned of your demonstrative skills in automotive technology and believe you can be successful in any career that you choose. 

We have decided to inform you about winning the award now, but because of the current situation with Covid19, we will not be able to present the award to you until school is back in session, in the Fall. Please notify us of any changes in your residence or status that we will need to know, in order to make certain you receive your award. 

The VAE has been given the great opportunity to work with the Mac Tool Corporation which allows you to enter their Student Discount Program that qualifies you to a 50% to 60% discount as long as you are a student. All you need to do is apply online at Mac Tools and the discount is yours. The $685.00 of Mac Tools that are being presented to you today is the result of this program. 

Beginning this year, we have added a small scholarship to the Golden Wrench Award. It consist of $500 which you may use should you continue your education at an appropriate secondary educational institute. Let us know when you have proof of acceptance to any field of study, from an accredited institution and we will release the funds to you. We hope you will take advantage of this opportunity to continue your education. 

Your award today includes: 

  • The recognition of the VAE and your school staff for your accomplishments 
  • $685.00 of Mac tools and our VAE Golden Wrench Award Trophy 
  • The book by Diandra Leslie-Pelecky, “ The Physics of NASCAR” 
  • A one year membership in the VAE that includes our monthly newsletter “Wheel Tracks” 
  • A $500 scholarship when you are accepted in any secondary education. 
  • Our Blessing to you and your future… Good Luck to you (student name). 

Ed Hilbert 
Ed Hilbert, Chairman, VAE Education/Outreach Committee