Zip-Zip, New Line

I recently discovered a neat trick to help form new hard brake lines. I am a huge fan of nickel copper tubing; it is very easy to form and lasts forever. I have found that it makes sense to leave a little more material on the end of the line when making flares, as the nickel copper compresses more than steel does.

When replacing a hard line with a new line, it is a lot easier to make all the turns and bends by zip tying the new line to the old one as you form it. Place several zip ties at the end, leaving enough room for the fittings, then add zip ties as twists and turns are formed. This method still leaves enough room to use tubing benders to form correct turns without pinching the line. When the new line is formed, just snip the zip ties off, add the fittings and make the flares on the ends. Your new line will match the length and shape of the old line.

Using this method, the new line should easily take the place of the old line and fit in the proper clamps and holders.

Fix Your Old Starter

Guest W. Jones this month shows you how to….. 

The starter motor is heavy, sturdy and unlikely to get much attention, but a faulty one will be a real headache. Often located in the depths of the engine bay, making it hard to access even in a workshop, it’s not the sort of component that you want to be trying to remove and dismantle at the roadside. There are two types of starter motors: inertia and pre-engaged. Inertia units are common to most 1960s (and earlier) classics, and work by spinning a Bendix gear that drives itself up the main shaft and engages with the ring gear. If it doesn’t engage, you’ll hear a distinctive metallic grating sound – it cranks the ring gear around. As the engine fires, the excess speed forces the Bendix gear out and a spring re-turns it home. 

Pre-engaged starters are more sophisticated, with a solenoid that pushes the Bendix to engage with the ring gear, before another solenoid supplies power to the starter and gets it to turn over. We’re focusing on the inertia version here, but the procedure is largely similar for either variant. With a tear-down, a cleaning and inspection, plus a fresh set of bushings and brushes, your starter should be good to crank away for years to come. 

First take off the brush cover plate and pry the brush spring clips from their posts in the brush cage. Two brushes will be connected to the backplate and another pair to the coil windings. Undo the nuts from the electrical connection tower and make a note of any insulator collars for reassembly. 

Remove the two long bolts on the rear of the starter and both cover plates and casing should come away from the arma-ture, which will be secured to the front plate. Be sure to mark with a prick punch for reassembly. Take it apart carefully and make a note of the number and location of any shims, thrust washers or nylon collars that come out with the shaft. 

Compress the Bendix spring using grips and pry out the retaining circlip and locating pin. The assembly should slide off, but may have a Woodruff key that can fall out. Note the order of assembly for later. The armature should now be removable through the front plate. Thoroughly clean off any grease. 

Inspect the condition of the insulation on the coil windings, which should be intact and free from moisture or corrosion. A specialist can re-varnish the windings if needed. The pole shoes around the coil should be clean and rust-free, and can be bead-blasted, but take care not to damage the windings. 

If there’s any movement between the armature shaft and the bushings, then the latter need to be replaced. Carefully drive out the old bushings with a socket that’s roughly the same size. Soak the new ones in oil for 24 hours before gently pressing them in with a vice. Ensure that the shaft spins freely in the new bushings. 

Using emery paper, clean the surface of both the winding ‘pack’ (the shiny steel area towards the center of image left) and the commutator ring (to the right). Spinning them in a lathe is best, but be careful not to take off more than light surface corrosion. Clear the end casings of any grease or oil. 

Brushes often have a maximum wear mark, typically about 1/3 inch deep. They need to be unsoldered from the terminal post, with the brushes often paired. They’re identical, but ‘earth’ brushes usually go on the end casing and don’t need to be insulated, while the ‘field’ coil brushes are on the main casing. 

Carefully inspect the Bendix gear. It’s a wearable item (made from mild steel, unlike the hardened flywheel ring gear), but the teeth should all be intact. You can clean worn edges on a grinder, but replacement is best. 

Rebuilding Brake Calipers

Years ago I would routinely rebuild brake calipers. Caliper rebuild kits seemed to approach the cost of purchasing a rebuilt caliper. For decades I would routinely purchase rebuilt calipers and exchange my old caliper as a core.

Over the past few years, I have had rebuilt calipers fail, and I have been less than impressed with the quality of the rebuilds. I have noticed an increase in quality in the past year, but I have also noticed a large price increase with this increase in quality.

With rebuild kits easily and inexpensively available on line, I have gone back to rebuilding my own calipers. Rockauto has both rebuild kits and new pistons for very reasonable prices. This has become more necessary with a drastic reduction in availability of rebuilt calipers. Most of my Saab calipers are no longer available, either as a rebuilt or a new unit.

To rebuild a caliper, I remove it, clean it, wire brush it, remove the piston and let it soak in a bucket of “Evap-O-Rust” for a day or so. If the piston is frozen, often I can coax it out by pumping the brake pedal. To remove a frozen piston on a caliper that is off the vehicle I have used a grease gun threaded in to the hose hole on the caliper.

Once the caliper is clean and rust free, I paint it. For a bare cast iron look, I use a lacquer paint called “Cast Blast.” It looks just like bare cast iron, but it won’t rust.

I have been very lucky with the condition of the bore. It has been years since I have had a bore that was so rusty it wouldn’t clean up with a cylinder hone.

Once the caliper is painted and honed, it is time to reassemble it. If the piston is scratched or rusty, it must be replaced. I use a thin smear of red brake hydraulic grease on the piston and the seal to prevent damage to the new seal. Sometimes the dust boot can be a bit tricky to install. Most often they are either held in place with a metal ring, or by the piston itself. If held in place with the piston, it needs to be installed before the piston is installed.
The piston should slide in easily. I have a handy tool to push the piston in. I lube the slides and the pins with synthetic caliper lube. Always replace the rubber hose, and use a little never seize on the bleeder screw and the hose threads.

One Hand on the Lever

Shift Fork

This month’s question comes from Wendell Noble. Anyone who knows Wendell and Mary know they have a preference for manual transmissions. Wendell asked me if I knew why his owner’s manual advises not to keep a hand on the gear shift lever while driving. 

The answer is, yes, I know. The gear shift lever is connected to the shifting forks inside the transmission via a mechanical linkage. The shifting fork slides an engage-ment dog to lock the gears together when you shift. The en-gagement dog spins with the gears, the shifting fork remains stationary. When the operator rests his hand on the gear shift lever, some force is transmitted through the linkage to the shifting fork. This force creates friction between the shift fork and the engagement dog, causing wear. 

Often, when a vehicle gets some age and use, the transmission linkage can develop a rattle. This can sometimes be silenced by holding the gearshift. This often is the genesis of a long lasting bad habit of resting a hand on the gearshift lever. To fix a rattle, the linkage can usually be repaired, either by tightening loose hardware, or replacing worn bushings. 

My stud welder/slide hammer

Happy New Year! Although 2021 will have many challenges, I truly hope we will all have a better year. 

subaru bumper repair

Absent any questions this month, I decided I would write a review for a very affordable and useful tool. I purchased a stud welder/slide hammer from Harbor Freight. This tool allows me to pull dents out, especially handy with blind dents, with no access from behind. 

While very handy for blind access dents, it is also handy for dent repair that will require repaint anyway. 

subaru bumper repair tool

I tried this tool out to repair damage to my Outback after it hit a guard rail (I was not driving…). I was very impressed with how strong the weld from the studs is, and how easy it was to pull the metal back with the slide hammer. I am also overly impressed with the quality of the welder. The slide hammer is not extremely high quality, but it works. I would love to have a blow molded case to hold this tool, but I guess that is too much to ask for at this price. I will probably buy a tool case from Harbor Freight to keep it in. 

slide hammer

I moved the slide hammer from stud to stud, until the panel was where I wanted it to be, when I was satisfied, I snipped the studs off and ground the welds away with a flap disk on my angle grinder. A skim coat of body filler, followed by filler primer, epoxy sealer, base coat and clear coat and it was done. 

I was able to fix the bumper with two-part epoxy, flexible filler primer, base and clear. The best part of this tool is that it is an affordable $100. I would consider that a bargain. 

subaru bumper dent fixed

How-to Lubricate Window Slide & Door Locks

had a question recently that may be of interest. The question was: “How do I lubricate my window slides and door lock hardware in my antique cars?”

fluid film

I use Fluidfilm to lubricate window regulators and the latch on the inside of the door. I undercoat my cars with Fluidfilm in the fall, and keep a five gallon pail in the garage for little projects. I keep a paint brush in the bucket, and use it to apply. Fluidfilm works well as a lubricant, does not wash off, and does not attract dirt.

The 2020 Golden Wrench Award

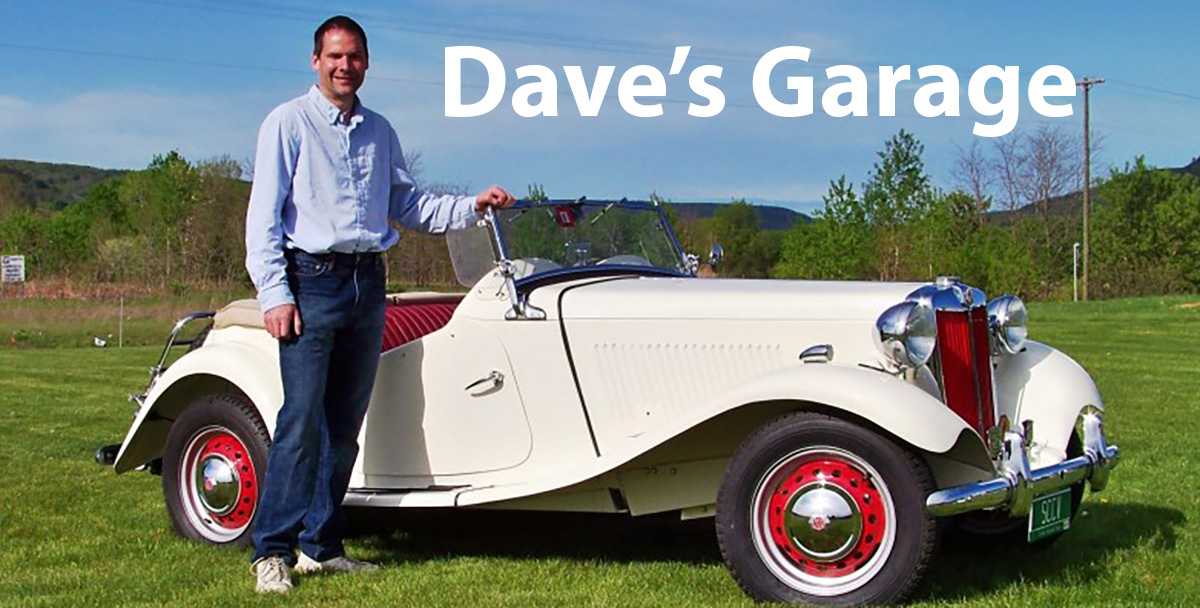
Dave’s Garage is giving space this month to the 2020 Golden Wrench Award Recipients. Congratulations to you all. 

The Vermont Automobile Enthusiasts 

Golden Wrench Award 

May 29, 2020 

(Address & student name……..) 

Congratulations! You have been selected to receive VAE’s Golden Wrench Award. We have found you best exemplify the qualities of the positive attitude toward learning and a drive to succeed in a career in automotive technology or any career that you choose. 

The Vermont Automobile Enthusiasts is an antique and classic car club dedicated to the preservation, protection, promotion and appreciation of automobile history and technology. The VAE is based in Vermont with members from ten States, Canada, Europe and China. 

Your award has come from our belief in the importance of education and continued learning. You are part of a very special group of Vermont high school juniors. You are one of sixteen outstanding students being recognized this Spring, from each of Vermont’s sixteen career centers. Our hope is that recognizing you in your junior year, will energize you to use your last year as a senior, to focus on your future. We have learned of your demonstrative skills in automotive technology and believe you can be successful in any career that you choose. 

We have decided to inform you about winning the award now, but because of the current situation with Covid19, we will not be able to present the award to you until school is back in session, in the Fall. Please notify us of any changes in your residence or status that we will need to know, in order to make certain you receive your award. 

The VAE has been given the great opportunity to work with the Mac Tool Corporation which allows you to enter their Student Discount Program that qualifies you to a 50% to 60% discount as long as you are a student. All you need to do is apply online at Mac Tools and the discount is yours. The $685.00 of Mac Tools that are being presented to you today is the result of this program. 

Beginning this year, we have added a small scholarship to the Golden Wrench Award. It consist of $500 which you may use should you continue your education at an appropriate secondary educational institute. Let us know when you have proof of acceptance to any field of study, from an accredited institution and we will release the funds to you. We hope you will take advantage of this opportunity to continue your education. 

Your award today includes: 

  • The recognition of the VAE and your school staff for your accomplishments 
  • $685.00 of Mac tools and our VAE Golden Wrench Award Trophy 
  • The book by Diandra Leslie-Pelecky, “ The Physics of NASCAR” 
  • A one year membership in the VAE that includes our monthly newsletter “Wheel Tracks” 
  • A $500 scholarship when you are accepted in any secondary education. 
  • Our Blessing to you and your future… Good Luck to you (student name). 

Ed Hilbert 
Ed Hilbert, Chairman, VAE Education/Outreach Committee 

Exhausted

When I pulled the Subaru in to take the winter tires off and wash the undercarriage I heard the unmistakable sound of a muffler leak. I was a bit surprised, as the car is only 5 years old. 

I looked at the muffler, and it looked like it was in good shape, until I saw the weld where the inlet pipe enters the front of the muffler. The weld was rusted through, but the muffler itself was fine. Replacement mufflers from Subaru are very expensive. Aftermarket mufflers only seem to last two or three years. I have had great difficulty having the “lifetime warranty” honored with premium aftermarket mufflers. Even quality aftermarket mufflers do not last as long as factory ones. Many mufflers are replaced due to rusted welds and flanges. 

I have replaced rusted flanges and joints, and repaired rusty welds and had the muffler last longer, than a replacement after-market muffler would have lasted. 

I just couldn’t replace a muffler that was still in such good condition, so I cleaned up the area with the broken weld, and re-welded it. Now, let’s see how long this repair lasts… 

I have always had a fear of fires

When the cars go in to the garage for the winter, I have always believed they should be drivable and ready to be driven out quickly if there is a fire. I leave battery tenders on lead acid batteries (but not gel cell batteries, they have no static discharge) and always disconnect the batteries to prevent an electrical fire. I always make sure the snow is removed from the garage doors, so there is a quick easy exit. 

garage fire

Unfortunately, the events of two weeks ago taught me some things about garage fire safety. I will share what I learned.  

First, the fire department did a fantastic job, and saved a great deal of the contents of the building. Only two cars were totally destroyed. The firemen tried to drive the cars out of the building when they responded. As luck would have it, the cars at the doors were cars with push button or foot pedal starters. Firemen are too young to understand this. They pulled the battery tenders, connected the batteries and turned the key… obviously the cars did not start. 

I have always been creative in fitting cars in to the garage to maximize space. This usually means jacking a car on a floor jack and sliding it into positions that al-low one or two more cars to be squeezed in. I will not do that again. I learned the cars should have a straight shot at the door in the event they need to be evacuated from the building quickly. 

Fire blankets saved the cars. The fire was very hot, melting glass and PVC piping in the building, yet there was only minimal damage to 12 cars just inches away from the fire. When the firemen realized they couldn’t drive the cars out, they threw fire blankets over them. 

This fire was hot. All the cars were driven in to the garage, only two were drivable after the fire (both Saab’s B.T.W.). All the cars received heat, smoke and water damage, and also were damaged by falling ceiling lights and sheetrock. 

Oddly enough, the garage doors opened by themselves, somehow, the heat caused the door openers to short out and open the doors. 

So, what have I learned? First, I will ensure the cars by the exit doors are either newer, automatic cars or at least key start. I will leave an instruction note on the dashboard on how to start the cars. 

Second, cars will be parked with quick and easy access to a straight path out the door. No more jig saw parked cars packed tightly in the building. 

I will continue to do what I have always done, disconnect the batteries, and keep fire extinguishers in all the vehicles. I will also not leave gas cans or flammable objects in the garage. I will avoid using extension cords and not leave items plugged in to wall sockets unless they are being used. As bad as this fire was, it could have been much worse. 

Ethanol Gas & Gas Mileage

Dave, 

I want to share, with you, my story on ethanol gas. As I recall you have done pieces on this topic in the past, however, I thought I would share with you my totally unscientific finding. 

I religiously try to use the non-ethanol in my old cars, lawn mowers, weed whacker, chainsaw, etc. 

Last summer, I had heard from a few folks about their using the non-ethanol gas in their regular driver and getting better gas mileage. My modern vehicle is a 2019 4WD Silverado Chevrolet. With about 10K miles on the vehicle and I was getting on average 21.9 mpg. I drove over 1,000 miles filling the truck with non-ethanol gas and my average was 24.9 mpg, an increase of 3 mpg. My cost per mile with purchasing the higher priced non-ethanol vs the regular ethanol cheaper, gas came out as a wash (depending on the price per gal purchased at the pump). So I figured if it is not costing me more, I am using 15% less fuel, and it should be better for my engine, I have stuck with buying the non-ethanol gas. I am a great environmentalist when it matches up with my cheap side! 

Obviously different drivers, different vehicles, different driving habits would change the results in either direction. Also this was not exactly an apples to apples comparison, because I was comparing regular ethanol to high test non-ethanol. I did not bother to compare how high-test with ethanol would fit in to this mix. Luckily for me I have a local station that carries the non-ethanol fuel. 

I wondered if you ever thought about the ethanol from this angle or not, regardless here is my unscientific sharing that I thought you might find interesting, if nothing else. 

-Eric 

Dear Eric, 

You are correct. Ethanal gas has less energy than conventional gasoline, and you will notice at least a 5% efficiency loss with ethanal gas. My findings have largely aligned with yours. My Subaru has the H-6 engine, which has a 10.7to1 compression ratio, and requires premium gas. When I replaced the head gaskets I had the heads planned flat again, requiring .007” to be shaved off. This obviously increased the compression ratio even higher. (Subaru does not recommend planning these heads…. I have put 100,000 miles on the engine since with no troubles). I also use premium gas in my Saab Turbos. The Subaru and the Saab’s will burn regular gas, but the timing is retarded so far, to prevent preignition that the mileage goes way down, and it actually costs me more money to use the 87 octane gas, due to the decreased mileage. I was also amazed to see how much air conditioning effects mileage. It can drop by as much as 20%. 

Unfortunately, I have only been able to find 91 octane non ethanal gas. Even the non ethanal 91 octane gives better gas mileage than the 93 octane 10% Ethanal gasoline. 

I have had a number of problems with the ethanal gas, with not only the antique cars and small engines, but my daily drivers too. On the antique cars I have had fuel sending units, fuel lines, carburetor rubber parts, fuel pumps and even gas tanks dissolve. I had an exhaust valve burn in my wife’s Chrysler minivan, and I had a plastic valve on the top of the gas tank dissolve on my Subaru Outback. 

Ethanal fuel holds moisture in suspension, which causes the fuel to rust fuel tanks away. I have had gas tanks dissolve on cars that were in extended storage , while stored inside climate controlled garages. 

The only positive thing I can say for ethanal gas is, I don’t have to buy dry gas anymore, I haven’t had a frozen fuel line in years