“Free” Inspections

Many new car dealers offer “free state inspections” for life when you purchase a vehicle from them. 

Why would car dealerships offer this? The answer is to get you into the service department after the sale of the vehicle. If you were to have the dealership perform scheduled maintenance and repairs, they would make money selling you these services. I have experienced several situations where the dealership uses the “free inspection” to pressure the consumer into consenting to repairs and services that are either not needed or should be covered by the new car warranty. 

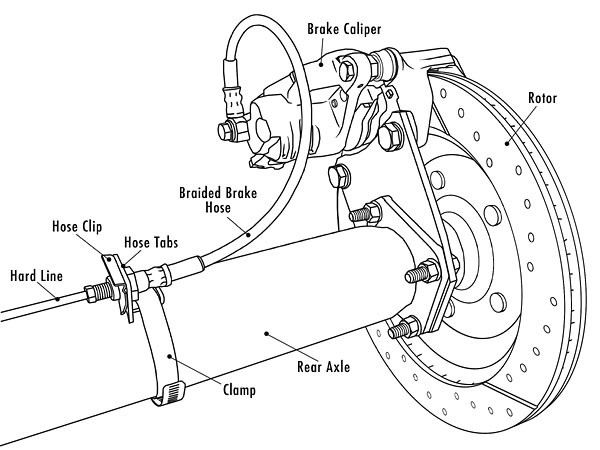
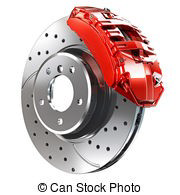
I have friends and co-workers who have shared stories of dealerships pressuring them in to performing services, or expensive repairs that may not be necessary. Recently, I brought a one-year old vehicle with 8,000 miles to the dealership for a “free” State inspection. The brake pads and/or calipers had seized, causing the inside of the rotors to not contact the inner brake pads. The dealership flunked the car but said for just less than $500 they could free up the calipers and pads and turn the rotors. I asked why a one-year old vehicle with barely 8,000 miles would need this work, and why it would not be covered by warranty. They stated the warranty only covers parts that need to be replaced, and they would not be replacing any parts. I asked for the keys back and brought the vehicle to an independent shop. The independent shop also flunked it for the same reason, in addition to finding worn out bushings in the rear suspension. They quoted a price of $850 to make the one-year old vehicle, with barely 8,000 miles covered by the factory warranty inspectable. The original dealer then sent out a bill for $45 for the “free” inspection. Apparently, if the vehicle fails the “free” inspection, and you opt not to pay them to fix it, they charge you $45 for the failed inspection. Remember, If the dealership performs a warranty repair, they bill the manufacturer a flat shop rate. The rate a consumer pays for the same repair is significantly more than the flat-rate the manufacturer pays. The dealership would make more money convincing the consumer to pay to make the repair vs. the manufacturer. Why do dealerships do this? Because it works, and they make a lot of money with this business model. 

My advice is this: 

IF you choose to exercise the “free inspection”, read your owner’s manual and warranty carefully before you go to the appointment. IF the dealer recommends any services that are not mentioned in the schedule of maintenance table at the back of the owner’s manual, do not consent to the services. If they push back, point out the factory recommended service schedule in the back of the owner’s manual. If they say service is necessary for an inspection, read the warranty carefully, and point out to them what is covered, and what is not. Remember, dealerships have the “free inspection” to make money on service. Be careful, and do not fall for high pressure tactics to have the dealership perform services that are not necessary. 

Frozen Calipers

Recently I have seen a lot of frozen caliper slides while replacing brakes. Some of these calipers were relatively new. 

Usually I can free up rusty frozen calipers with an ATF/acetone mixture, wire brush the pins, clean and lubricate the slides and reassemble the caliper. Sometimes, the slides are so rusty I can’t free them up without breaking them. 

New calipers usually come with a light grease on the slide pins. I have found this grease is insufficient to keep the slides from seizing, especially on cars exposed to road salt. 

When I do a brake job I always remove and lubricate the caliper slide pins with caliper grease, even with new calipers. I also lube the contact points of the pads with caliper grease to prevent them from being seized in the calipers. Sometimes I have to dress the tabs on the brake pads with a file to open the gap enough to provide a slide fit in the caliper. 

It is also important to use never-seize on all the hardware when reassembling the brakes. 

Hot Spark Plugs Vs Cold Spark Plugs

In modern, computer-controlled cars, ignitions are reliable to the point where you rarely consider that they might fail. You have coil-on plugs, also called stick coils, snapped onto the tops of spark plugs, with not even a plug wire between them. The stick coils and plugs are typically hidden inside the engine under a plastic cover that looks like the top of a Shop-Vac. There’s no distributor, because the functions of advancing the spark with increasing engine rpm and distributing it to each cylinder are performed electronically, with everything controlled by the car’s electronic control unit, or ECU.

This is not the case in classic, antique and brass era cars, unless they have been changed-over to electronic ignitions. If, however, you do have the original ignition, a lot can be learned about the running of your engine.

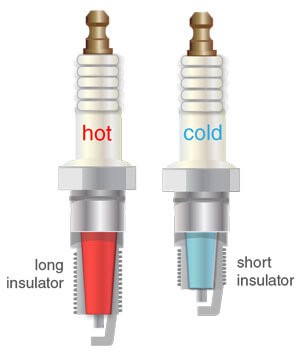
A hotter plug does what is says, it runs hotter. This will not give any more power and neither will a too cold plug. Because the spark plug resides in the combustion chamber, it’s influenced by what happens there. It serves a dual purpose; not only is it responsible for initiating the combustion event, but it gladly tells the tale of how the chemical to mechanical energy exchange process took place. If all is well, the plug is clean, but if something is not correct, it will leave its mark for the trained eye to diagnose. In many ways, the spark plug could be looked at as one of the first forensic investigators. You can work out whether you need a hotter or colder plug by looking at the current ones. If the current plug is too hot then the tip may be melted or deformed. If the plug is too cold then you may have excessive build up (which can also be caused by burning oil or a rich air-fuel mixture).

If you can be “tuned in” to your plugs, you will be able to read problems in your old car before it leaves you by the road. Cleaning with steel wool is better than nothing. Using a spark plug sand blaster gives the best cleaning although you can damage the porcelain insulation and cause the spark to “go to ground” somewhere besides the end electrode, it’s proper destination.

Encrusted black carbon is a sign of problems. The causes of this condition may be a cold type of plug, which is proper if you are using the car for long road trips. If all you are doing is driving the car off and on a trailer or around the block and back, change to a hot plug.

Excessive oil reaching the combustion chamber, especially at slow or idling speeds, is also a frequent contributor. A hot plug temporarily may solve the problem, but excessive oil is a sign of other problems, as in bad rings or pistons.

If some of the plugs are clean and others have dry sooty lamp black deposits, the sooty plugs are getting too much gasoline, and can be corrected with carburetor adjustments. If a leaner mix is used, and the engine runs irregularly or misfires, go back to original setting and consider a hotter plug.

Incorrect gaps also contribute to fouling, and is attributed to too narrow a gap. Check the gap and published specs on your car and re-gap all plugs.
The spark plug tip temperature must remain between 930°F to 1560°F , regardless of the type of engine the plug is fitted in.

If the tip temperature is lower than 930°F, the insulator area surrounding the center electrode will not be hot enough to burn off carbon and combustion chamber deposits. These accumulated deposits can result in spark plug fouling, leading to misfire.

If the tip temperature is higher than 1560°F, the spark plug will overheat which may cause the ceramic around the center electrode to blister and the electrodes to melt. This may lead to pre-ignition/detonation and expensive engine damage.

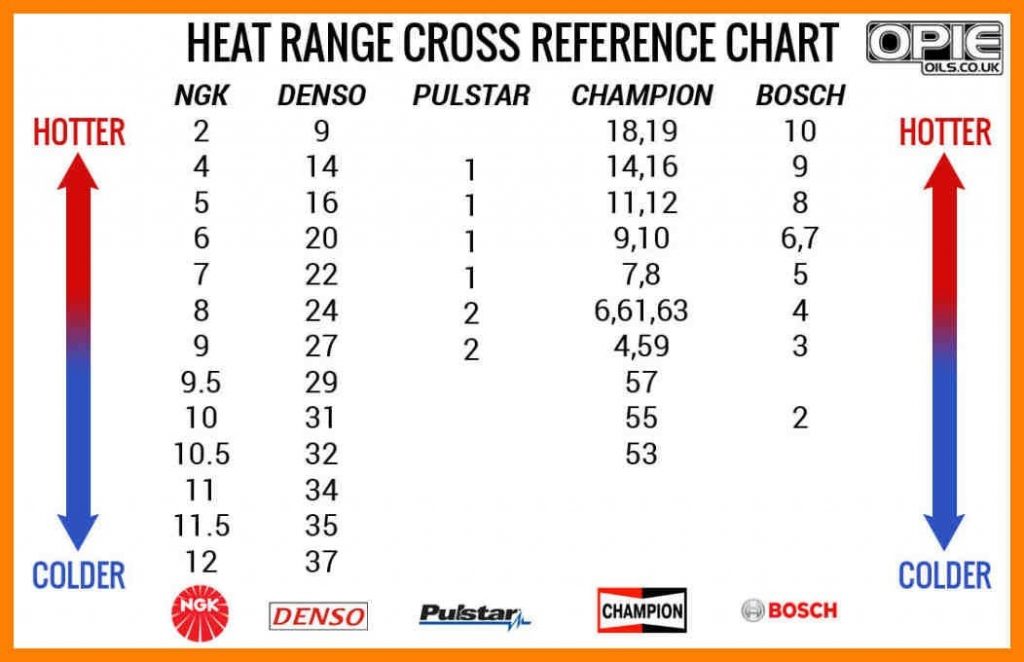
In identical spark plug types, the difference from one heat range to the next is the ability to remove or add approximately 150°F to 200°F in the combustion chamber.

A Franklin Automobile Enthusiasts

Do you remember the TV series Mash? 

Did you know those helicopters that flew in wounded soldiers were Bell 47s units….and the engines they used were Franklin engines

The Franklin O-335 air-cooled aircraft engines were six-cylinder, horizontally-opposed displacing 335 cu in with a power output of around 225HP. 

When the Franklin auto company went bankrupt in 1933, two of Franklin’s employees purchased the rights to the engine and continued to use the name Franklin. The engines were used in trucks and as stationary units, until WWll began and then went into production for use in over 15 U.S aircraft and helicopters. 

Republic Aviation Inc. purchased the Franklin engine rights in 1945 and produced the Franklin engines for light amphibious aircraft. This company was short-lived with the war ending that year. 

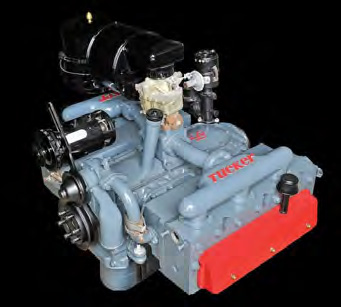
In 1947, the Tucker Car Corporation purchased the engine rights, where the 50 cars that Tucker produced, were powered by Franklin engines. The home of the Tucker Car Club is now at the AACA Museum in Hershey, PA. Tucker reworked the engine from air-cooled to water-cooled and many examples can be seen on the museum floor today. 

In 1961, the Tucker family sold the engine rights to a company called Aero Industries and from there to the “Government of Poland” in 1975. The Polish engine manufacturer is today called “Franklin Aircraft Engines” and are manufactured in Grudziądz city in Poland. 

Saab 900

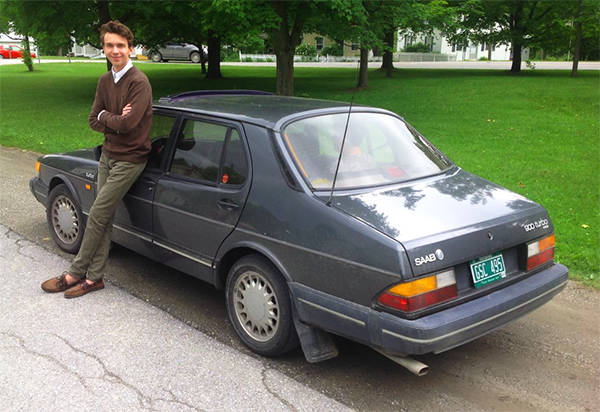
Absent any questions this month, I will briefly discuss some cars in my shop this month. Both of my sons now have cars. I wanted their first cars to be something durable, safe and inexpensive. Somehow, each of them ended up with a Saab 900 four door. 

When I learned how to drive, people maintained their own cars. Times have changed. Today, people don’t work on cars; they either take it to someone to have it repaired, or they replace it with another car needing less work. 

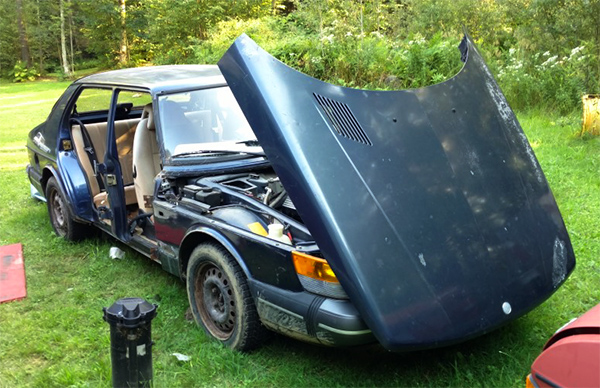
My older son has a strong interest in cars, and has a nice 900 Turbo. It needed some work when we got it, and while fixing it he was able to learn some basics on how things work and how to maintain a car. My younger son was just looking for basic transportation, and he found it with a base model 900 with an automatic transmission. This car needed a lot of work, and he and I have been working on it for the past year or so. This car was not really worth saving, but was almost too good to scrap. 

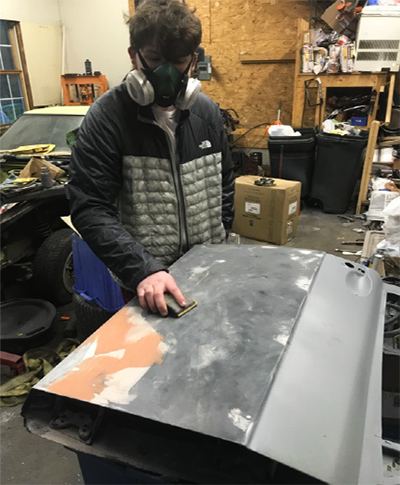
These projects are teaching basic auto mechanic skills, like brakes, suspension, electrical and exhaust and also more advanced body work skills with rust and dent repair and painting. They will not only learn skills to maintain a car, but also will have some personal investment in their cars. 

These projects also provide an opportunity to spend time with them. Cars come and go, but quality memories last a lifetime. 

Timing Is Everything!

A co-worker of mine just had an expensive experience with her Volkswagen. 

vw 5v timing

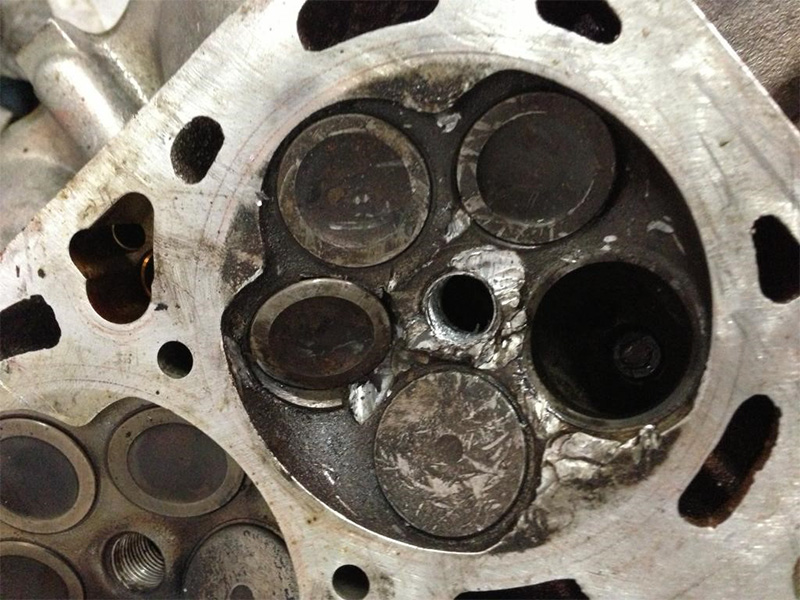
The car has the two liter twin cam engine, with a timing belt. The car had 85,000 miles on it, and had the original belt. This engine has five valves per cylinder, and it is an interference engine, meaning the valves will hit the pistons if the camshafts turn out of sync with the crankshaft. 

Unfortunately, the timing belt broke. When the belt broke, the valves hit the pistons, bending the valves. What should have been a several hundred dollar preventative maintenance repair, just became minimally a $1,200 repair. Minimally, the head needs to be rebuilt with new valves, if it can be saved. The head may well have to be replaced. The pistons could be damaged as well. 

If your car has a timing belt, it is not worth delaying the timing belt replacement, especially if it has an interference engine. A proper repair may involve replacing the water pump, camshaft seals and the front crankshaft seal. 

A Positively Good Idea

Recently I attended a SCCV driving event. Part of their pre-event inspection is verification of a cover for the hot battery terminal. I checked my car a few days before, and realized the positive battery terminal was not covered. I spent a minute thinking of all the possible ways the positive terminal could be accidentally shorted to ground. If nothing else, when working on the car, a wrench or other tool could easily be accidentally dropped, causing a direct short. 

The positive terminal is just a few inches from the aluminum A/C lines, the inner fender, and numerous bare nuts and bolts. I can understand the concern, the battery could easily be accidentally shorted out. 

I went to the local auto parts store and bought a pair of universal battery terminal covers. I had to cut it a little to make it fit my car. Just for good measure, I used a red zip tie to hold it in place. 

I passed the safety check with no issues, they checked to ensure the battery was securely held down, that the hot terminal is covered, the front end was tight, and there was nothing loose on the body of the car. 

I have also decided that the hot terminal of all my cars will be covered, as an extra safety measure. The $5 spent for terminal covers is cheap insurance and piece of mind. These covers can easily and quickly be removed for display on show cars. 

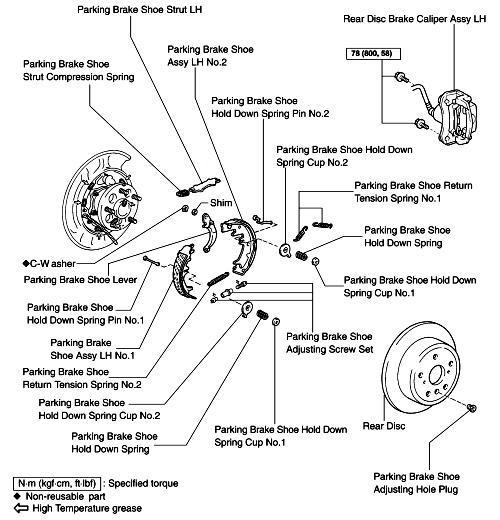
My rear disc brakes with the emergency drum brake

disc brakes with emergency brake
An example of a drum emergency brake with regular disc brakes. 

This was the good news! Something strange happened to me last week. I loaded the garbage and the recycling into the minivan to do the Saturday trip to the transfer station, and the right rear wheel locked up when I backed up. As this happened, the rear axle made unpleasant noises. I thought the parking brake was seized, and was relieved when the wheel moved ok going forward. 

On the way home, the right rear wheel locked up while driving forward, making horrific noises. Again, I thought the noise was originating from the rear axle. I definitely heard the differential banging against the frame cross member it is mounted on. I drove up my driveway, with the wheel seized. I googled the problem, and found many stories of the rear differential failing, causing a rear wheel to lock up. Fortunately, the part is available rebuilt, but they are expensive. 

I planned on removing the differential to verify it was in fact bad before I purchased a used or rebuilt unit. I thought I should check the right rear hub first to rule out any problem there. Fortunately, I found the problem. This vehicle has four wheel disc brakes, with the parking brake on the rear. The parking brake has conventional brake shoes on a drum in the center of a “hat” type rotor. Somehow, something came apart with the parking brake assembly, and the whole assembly broke apart and jammed against the rotor. I have to replace the backing plate, caliper mount, rotor and the whole parking brake assembly. It is bad, but infinitely better than a bad differential. I have never seen anything like this before. 


A few more points about BEARINGS 

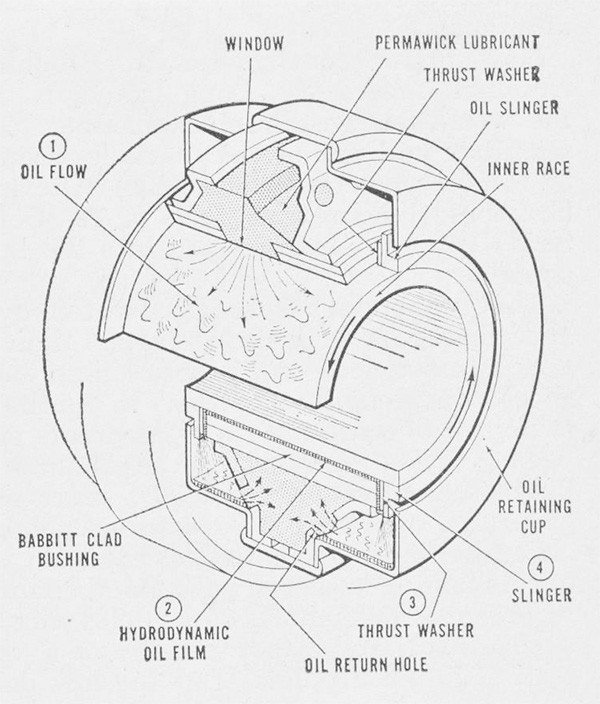
Pictured below, and the following is an article from the December, 1960, “Science and Mechanics” magazine. 

Bearing Lubricates Itself 

wheel bearings

Designed to replace ball bearings and have several times their life expectancy, this new Hy-Film bearing never requires relubrication. It utilizes the phenomenon of hydrodynamic oil film. The diagram at left: (1) Oil is drawn from reservoir through bearing window; (2) rota-tion of inner tace under load generates hydrodynamic oil film, supporting race without metal contact; (3) oil forced to bearing ends by film pressure lubricates thrust washer and (4) oil is picked up by slinger and returned to retaining cup, where it is reabsorbed by Permawick in oil return hole. Tann Bearing Company of Detroit, Michigan, designed and developed the bearing. 

What is hydrostatic and hydrodynamic bearing? Hydrostatic bearings are externally pressurized fluid bearings, where the fluid is usually oil, water or air, and the pressurization is done by a pump. Hydrodynamic bearings rely on the high speed of the journal (the part of the shaft resting on the fluid) to pressurize the fluid in a wedge between the faces. 

What are the types of bearings? There are many types of bearings, each used for different purposes. These include ball bearings, roller bearings, ball thrust bearings, roller thrust bearings and tapered roller thrust bearings. 


?????????????????????????????????????????????????????
I am running out of ideas on what to write about in this column. If you have any ideas, or any questions you want me to answer, please let me know. 

Dave’s Garage…email: dasander@aol.com 

One Thing Leads to…

With no questions to answer this month, I thought I would share an interesting story. 

Have you ever been putting off a big job, expecting it to be difficult, only to be pleasantly surprised at how simple it is? I have had this happen to me. I have also had what should be very simple job turn out to be a nightmare. I recently had what should have been a simple job turn out to be a much bigger job. 

In August I lost the clutch in one of my Saab 900s. This car was from Southern California. It has never seen salt, and rarely saw rain. It is a fun car to work on. Nothing is rusted or frozen. 

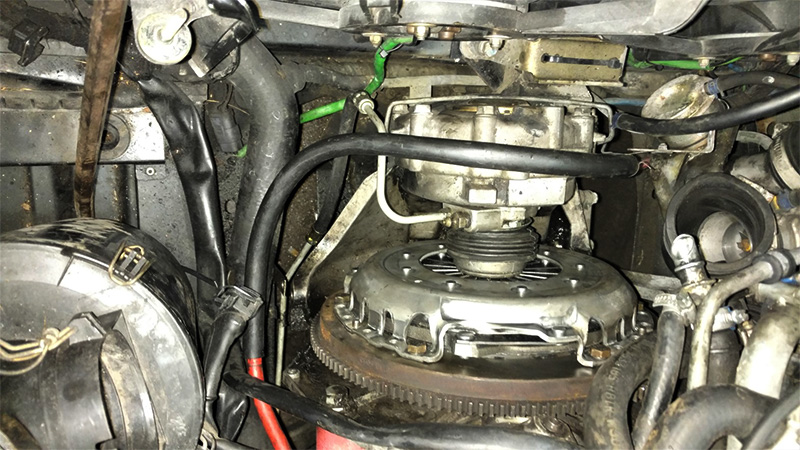
saab 900s clutch

Now, on a Saab 900 the engine is bolted on top of the transmission, and the whole assembly is mounted backwards in the car. The clutch is on the back of the engine, which is up front by the radiator. I have done a complete clutch job in about an hour. It is a relatively quick and simple job. 

I realized the problem with the Saab clutch was the master cylinder. I ordered a new one and attempted to install it. It is a traditional master cylinder attached to the firewall with two studs. I was just finishing the installation when one of the studs broke off. I was just tightening the nuts on the studs when the wrench came loose. I had just begun to snug the nut, I hadn’t even begun to apply much tightening force. I removed the part to find that the ear, the stud was threaded into, actually broke off. It was a defective casting. Ok. No big deal. I obtained a replacement and installed it. 

When I drove the car to work the next day I noticed the cruise control no longer worked. Somehow while working under the dash I broke the cruise control. On the way hone, I lost the clutch again. A quick inspection revealed the hydraulic hose between the master and the slave burst. Ok, not a big deal. I replaced the hose. As I was bleeding the clutch, the slave cylinder blew. To replace the slave cylinder the entire clutch assembly needs to be removed. When I removed the clutch assembly, I noticed the rear main seal on the engine, and the pilot shaft seal on the transmission were leaking, the clutch had oil on it, and the pilot bearing was seized. I ordered a complete clutch kit, and new seals. I resurfaced the flywheel while it was apart, and installed the new seals and the new pilot bushing. 

I had a bear of a time installing the new clutch, it just did not fit. I couldn’t align the pressure plate quite right to install the bolts, and the pilot shaft just would not fit in the clutch disk. After wrestling with it for over two hours, and cutting my hands several times, I realized I had the wrong parts. They were boxed wrong. I had ordered the right parts, but the parts supplier gave me the wrong parts. After a conversation with the parts supplier I received the correct parts, and again attempted to install the clutch. I had it almost installed, when I realized one of the dowel pins fell out of the flywheel. I had to take the assembly apart to get the pin out of the bell housing. After reassembly I was installing the slave cylinder bolts when one of them stripped. I could not understand how it stripped, as I never snugged the bolt. Again, the whole assembly had to come apart to fix the stripped threads. I realized someone had installed the wrong bolts at some point, these bolts were too short, and one was cross threaded. 

The project is almost done. Hopefully I just have to bleed the clutch and finish putting it back together. Should be done this weekend, almost four months later… 

Rust Repair

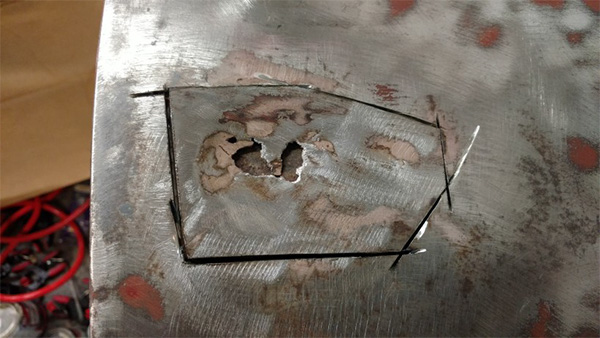
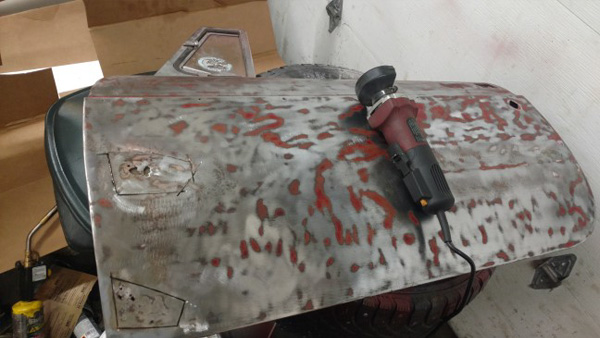
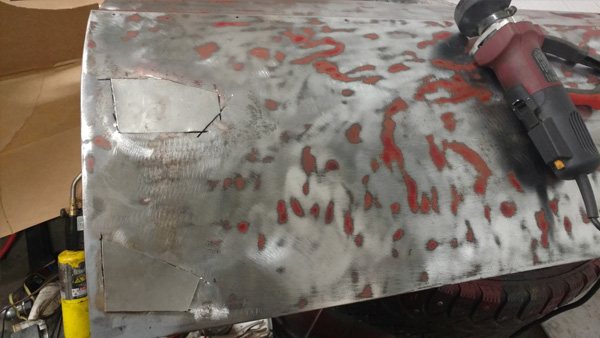
Recently I have had two cars in the garage for rust repair, a Saab 900 and an MGB.

The interesting thing is, on each car the rust was caused by poor body work. Each car had plastic body filler repairing a dent. The body filler was applied to bare metal. At some point, the body filler cracked and moisture seeped in. Body filler does not stop water.

Water can creep down through the filler to the bare metal, and cause rust. On each car the metal behind the body filler had rusted away, leaving rust holes.

After I do the hammering and welding, I coat bare metal with epoxy primer BEFORE I apply any body filler. I also start with aluminum body filler first, then transition to traditional polyester body filler. Aluminum body filler does offer some resistance to moisture.

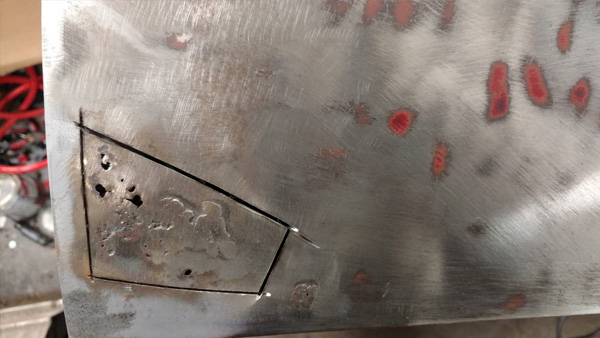
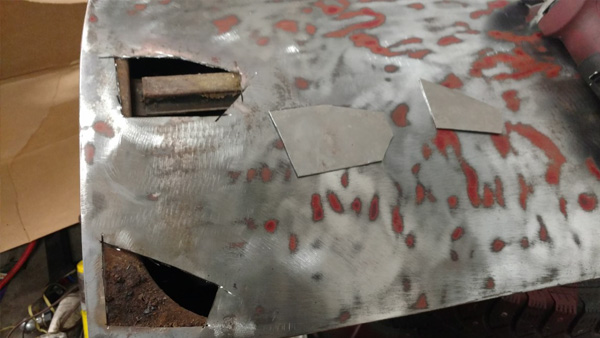
To fix these rust holes, I used a cut off wheel to cut out the rusted metal. Next, I traced the cut out piece on new sheet metal with a sharpie marker. I carefully cut the piece out, subtracting about 1/16” on each side. The new piece was carefully mig welded in, only welding about 1/4” at a time to prevent heat warpage. After the weld-ing is finished, the welds are ground flush and the metal is hammered flat. Next I apply a layer of epoxy primer, followed by a light skim coat of body filler.