Automotive Primers

1018 primer adMy last column discussed the evolution in paint technology. This month, I will talk about what is under the paint and talk about primers.

Automotive primers have come a long way in the last few decades. Primers serve several functions. First, they bond to and protect bare metal. Second, they fill very small imperfections. Third, they provide a stable base foundation for the top coat, or color paint.

Why are there so many types of primer? Not too long ago, primers were lacquer based. If the top coat was lacquer this was simply applied over the primer. If the top coat was an enamel paint, an enamel primer/sealer was applied over the lacquer primer. These primers were often unstable, and did little to protect metal from corrosion. Lacquer primers would shrink months or years after being sprayed, showing sanding marks and causing the top coat of paint to crack. Lacquer base primers do not shed water, they actually absorbed some moisture. This moisture would then find its way down to the bare metal. Of course, lacquer based paint will go back to a liquid when exposed to a solvent, like lacquer thinner.
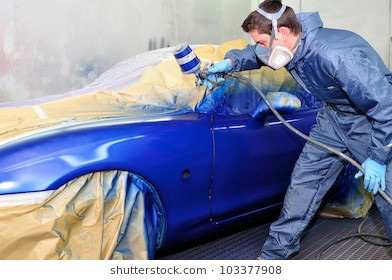
auto paint sprayAcid etching primers did a good job of adhering to bare metal, but offered little corrosion protection.

Epoxy primers, or “2K” primers bond well to bare metal, and also offer excellent corrosion protection. Epoxy primers are not sandable, and do not work well as a primer surfacer.

Primer-surfacers are used for final body work to give a smooth, flat surface foundation for the top coat or color paint. These primers have filler in them, and are easily sandable. These are the primers that are laboriously block sanded until the surface is smooth and flat.

Once the block sanding is done the primer is sealed with a sealer primer.

Final paint will show color shift if painted over different color primers, and will also show any sanding marks. Color paint is only a pigment, and will not hide anything underneath.

Confused yet? Don’t be. There is a system to priming. You may remember about 20 years or so ago car ads talked about the multi layers of paint. As urethane paints began to dominate the automotive paints, these “multi-layer” paints became standard.

First, an epoxy, or catalyzed primer coats and seals bare metal. There may be a self etching or acid etching primer under the epoxy primer. Epoxy primer has exceptional adhesion and corrosion protection.

Over the epoxy primer is a primer surfacer. This primer is sanded smooth and flat. Over the primer surfacer is a sealer. The purpose of the sealer is to provide a thin, hard, smooth surface over the primers for the color coat. Without the sealer primer, sanding marks and color changes will show in the top coat of paint. Sealers need to be top coated relatively quickly for the color paint to bond well.

If the color coat is a base/clear system, then there are two additional layers of paint on top of the primers.

I am amazed at how well these new primers work. I have had excellent results with using epoxy primer for rust repair. The rust repair actually outlasts the factory corrosion protection. Two part catalyzed primer surfacers are easy to sand, and remain stable forever. No more sanding marks showing up months after a car is painted. I often use epoxy primer thinned with reducer as a sealer. It is a bit more expensive than sealer, but it is one less product to have on hand, and I have been very pleased with the results.
Automotive Paints

This month’s question comes from Wendell Nobel:

Dave, I would love to read a little dissertation on automotive paints. I recall a day when GM cars were all painted with acrylic lacquer and Fords were acrylic enamel. Now we have polyurethane base coat with clear coat, single stage urethane and even some water based stuff. What is an antique car guy to make of it all? Should we use what was on the car when new or get up to date? Will environmental laws make the question moot?

Let me first briefly explain the history of automotive paints. The early autos were painted with the same paint people had been painting carriages with for years. There was no “automotive” paint. Not paint in the traditional sense we think of when we talk about paint today. Early paint was basically linseed oil and a binder, with pigment, or crude shellac. This paint was applied with a brush and took a long time to dry. These paints were not very durable, often literally falling off the metal in a year or two. These finishes offered very little U/V protection and broke down quickly.

The biggest challenge with producing the Model T Ford and other early cars was the time and space needed to paint cars. The parts were laid out on the floor and took days to dry. This bottle neck in the production was a huge problem.

Nitrocellulose Lacquer paint was developed to alleviate the time/space problem. Nitrocellulose Lacquer paint is made from the nitration of cellulose plants (boiling down plant fibers and mixing with nitric acid). This is also how celluloid film was made. The solvents evaporate from the paint, leaving a glossy durable paint finish. These paints need to be “rubbed out” to produce a shine. This paint does not “cure” and will return to a liquid state when solvents are applied. A popular early nitrocellulose lacquer paint was DuPont “Duco” paint.

Nitrocellulose Lacquer dominated the automotive paint market from the early 1920s well in to the 1950’s when it was displaced by Acrylic Lacquer, a synthetic polymer acrylic resin based lacquer. Acrylic Lacquer dried quickly, however, still needed to be buffed to a high gloss.

Enamel paints used enamel resins. This type of paint takes much longer to dry than lacquer and actually dries in two steps. First, the enamel reducer evaporates and the paint becomes solid. Next, the resin oxidizes when it reacts to the air. This is why the new finish cannot be waxed for 30 days after application. The enamel paints dry to a hard, glossy finish and do not need the rubbing out as lacquer needs. The drying of enamel paints could be accelerated by the use of a baking oven.

Enamel paints required the need for clean spray booths. The paint took so much longer to dry than lacquer paints; the finish was much more susceptible to damage from debris before it dried.

Lacquer and enamel paints were much more durable than the paint they replaced, but still offered minimal protection against U/V light and corrosion.

Lacquer and enamel paints are very unstable, and begin a color shift almost immediately. This fact makes them very hard to color match. People go to great lengths to match original colors. Unfortunately, the reality is the “original” color was so unstable there really is no true original color. Two cars painted the same color at the same time would not match each other after a few years time.

Today’s urethane paints offer much more protection than the lacquer and enamel paints they replaced. Urethane paint cures in three steps: evaporation of the reducer, oxidation of the resin and an irreversible chemical reaction between the resin and the isocyanate catalyst. Urethane paints began to be widely used in the late 1980s.

Base/clear paints offer even more protection. The color coat is completely buried under a protective clear coat. The clear coat provides the gloss in the paint.

Modern catalyzed urethane primers and paints offer a finish that can easily last the life of the car. I have found bare metal painted with epoxy primer and top coated with urethane paint offered very effective protection against corrosion.

So, what is an old car person to do?
Nitrocellulose Lacquer is almost impossible to find today. It also cracks easily, and will return to a liquid when exposed to solvents. Lacquer requires sanding and buffing to get a good gloss. Enamel paints are harder to paint, do not have stable color pigments, and oxidize quickly.

An authentic restoration would require the use of the original type of paint. Modern urethane paints do not have the same gloss and color hue; however, they are much more stable. Enamel paints are still available, although somewhat hard to get. Given the time and expense involved in a proper paint job, you have to consider the service life of the paint. Do you want to paint it again in 10 or 15 years?

Modern urethane paints are very forgiving to paint, and last a long time. Modern urethane finishes have a fantastic shine, and require minimal maintenance.

If you want to exactly duplicate an original car, you may want to consider a period correct paint. If you want the best shine, great corrosion protection and minimal maintenance you probably want a modern catalyzed urethane paint. I guess it is ultimately up to the user to decide which way to go.

Just to complicate things, there are new paints being used now which are replacing urethane paints. Waterborne paints are now on the market. Waterborne paints do not have the Volatile Organic Compound exposure of urethane paints. Use of waterborne paint, is being mandated slowly, due to environmental concerns.

Z Car Update

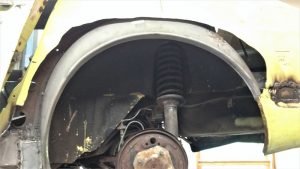
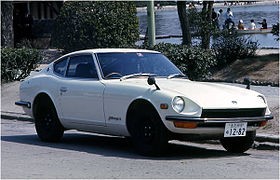
1972 datsun 240z wheel arch restorationAbsent any questions this month, I will give a brief Z car update. The car is a 1972 Datsun 240Z receiving a total restoration. The car had significant rust in the lower body panels and floor. The left side was much worse than the right side.

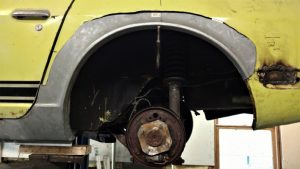
Work on the left quarter panel is progressing. The rusty inner wheel well was totally replaced. This involved drilling out the spot welds and removing the old panel. Fortunately, well made replacements are available. The new part was an exact fit. With the new inner wheel well in place, the repair of the outer quarter panel could proceed.

1972 datsun 240z wheel arch restorationWe obtained a Tabco rust repair panel. This panel is made of nice thick steel, but the fit is poor. I like to keep as much of the original car as possible. We went just above the rust, cutting the metal out, just above the rust area. We only cut out the rusty part of the quarter panel, and will weld in the replacement panel.

When fitting a weld repair, I do not like straight lines or sharp angles. I find it easier and stronger to have the weld seam a series of curved lines.

The repair panel was carefully trimmed to fit, and will be welded shortly. It will be spot welded along the wheel well, as original. I may also use two part panel epoxy, this will produce a much stronger, more weather tight bond than it had at the factory.

1972 datsun 240z

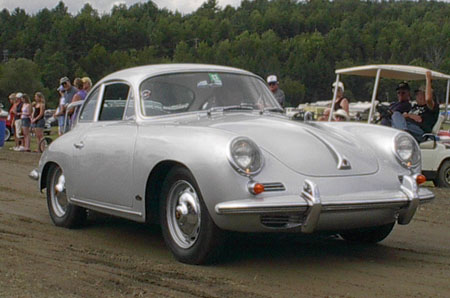
Editor’s notes….David and son, Sean, will have the Datsun 240Z at the Shelburne Show on Father’s Day weekend. A beauty of a car, as witnessed in the file picture to the left, is outstanding. Hiratsuka, Kanagawa in Japan is where they were built from 1970 to 1973. The 240Z was meant to compete head to head with the MGB-GT and won the race with its great de-sign and relatively low price.

Sounds Good – A Bright Idea

led headlightsOne of the headlights recently burned out on one of my Saabs. No big deal, this happens every so often. A set of premium brighter bulbs costs almost fifty bucks, and I have noticed they do not last as long as the regular bulbs. A pair of LED bulbs is only fifteen dollars more, and these will outlast the car. I decided to order the LED bulbs and try them. They are a direct fit replacement for the standard halogen bulb. Unlike many LED bulbs on the market, these bulbs are an engineered replacement for the incandescent bulbs.

On some vehicles, like my Chrysler minivan, the headlight needs to be removed to replace the bulb. This requires removing five bolts and takes time.

In addition to lasting much longer, the LED bulbs do not generate heat, takes far less energy, and you can actually touch the bulb without destroying the bulb. Interestingly, I noticed both old headlight bulb pigtails were partially melted when I installed the LED bulbs.

I will drive with these bulbs for a few weeks to make sure they work, at least, as well as the incandescent bulbs.

I bought these bulbs from superbrightleds.com. I am very impressed with their quality, selection service and price. They list replacement LED bulbs for virtually every bulb in the car.

Sounds Good

sounds goodI recently lost the radio in my every day Saab. I went to crutchfield.com to look at a replacement stereo. I wanted something inexpensive that would simply replace the radio in my car. I was surprised to see the many options and reasonable prices.
For less than 200 dollars, I can fit a replacement radio, with a CD/DVD player, Bluetooth, a video screen and a touchscreen. For a couple bucks more I can add a back up camera.

A unit with all of these features and GPS is roughly the same cost as a stand alone portable GPS unit. Of course, buying the unit from a place like Crutchfield includes plug and play wiring and all hardware needed to make the installation look factory original.

I am amazed at how many features these aftermarket stereos have, and at how much the cost has come down. Now, if I can figure out how to add side curtain air bags, collision avoidance and adaptive cruise control I would never need to buy a new car again.

EASY OIL SEAL INSTALLATION TOOL

easy oil installation toolAnyone who has replaced oil seals without removing the shaft that seals against the seal knows what a struggle the seal installation is. Think of replacing the front main crankshaft seal in place without removing the timing cover or the crank shaft. This job requires applying equal pressure around the circumference of the seal, or it will warp or bend.I have taken several pieces of scrap PVC Schedule 40 drain pipe and cut it in lengths of three inches or so. Interestingly, the diameter of many grease seals is the same diameter of PVC drain pipe. The thickness of the PVC pipe is the perfect thickness to use as an oil seal installation tool.

I have diameters of inch, inch and a half, two inches, two and a half inches, three inch, etc., sitting on my tool shelf, standing in the ready to use for seal installation.By placing the appropriate diameter pipe over the seal the seal can be easily tapped in to place with a mallet. For larger diameter seals, and pipe installation tools, I have a piece of 2 by 4 to place over the pipe before tapping with a hammer.

Engine Management Upgrade

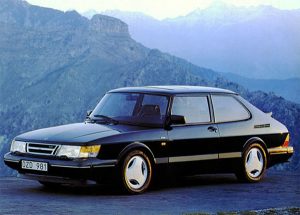
1987 saab 900The distributer in my 1987 Saab 900 Turbo recently broke. Even though it is a Bosch distributer, it is no longer manufactured and parts are not available. This distributer was only used on model years 1986 and 1987. I was able to find a used one; however, several people suggested I upgrade the engine to the later fuel in-jection and ignition system.

The fuel injection and engine management electronics on this car were state of the art, in 1987. Engine management technology improved significantly since.

Saab continued to use this same basic engine right up to the end, and the engine was updated to coil on plug ignition and an improved fuel injection/engine manage-ment system. By upgrading the engine, the engine performance was significantly improved, as was engine efficiency. I have been told to expect an extra 6 miles to the gallon, and an extra 40 horse power with the change to the later components. Another benefit is OBD 2 engine management. Diagnosis and repair of problems is easily handled with a universal OBD 2 code scanner, no more dependence on a Saab Tech II code scanner.

To make the change, I can either take the components off a newer Saab, or buy a conversion kit. The process involves removing the distributer, coil, electronic control module, and the various electrical components and installing the newer components with some extra sensors. Many cars from the 1960’s through the early 1990’s have engines that continued in production through the evolution of modern engine management. Upgrading these engines to modern engine management could be a fun project, with great rewards.

It’s in the Bag

When doing engine work or restoration work, organization is key to success. I recently overhauled an engine in my shop, and I was greatly aided by a careful and thoughtful organization when I took the engine apart.

I carefully catalogued the nuts, bolts, hardware and parts in zip lock bags, carefully labeled with a sharpie marker. The valve cover bolts were placed in a sandwich sized bag, labeled valve cover bolts, Left. The head bolts and miscellaneous hardware were placed in quart sized bags and labeled. These bags were then placed, in a gallon sized bag, labeled and Left.

This method continued through the engine disassembly. The oil pump bolts were bagged, and placed in the bag with the oil pump. All of the bags of parts were placed in a box with all the other parts.

When I reassembled the engine, all of the nuts, bolts and miscellaneous hardware were easily located, and the order of opening and unbagging the parts, easily gave me what I needed without wasting time searching, and minimizing the risk of placing the wrong hardware in the wrong location. When installing the left cylinder head, I grabbed the bag labeled Left, and all of the hardware was clearly labeled. When I was done, all the hardware was accounted for. There was nothing missing, and nothing left over.

I also use this strategy when I take a car apart for major work or restoration. There is nothing more maddening than not being able to find a part when needed.

Zip Lock freezer bags have an extra strong zipper, and provide a white rectangle for labeling. The next time you are in the grocery store, I would suggest buying a few boxes of sandwich, quart and gallon sized zip lock freezer bags for your shop.

Alternator Maintenance

I recently had a Subaru Outback in the shop for some extensive maintenance. I had to remove the alternator to do this work. The car had 185,000 miles on it, and still had the original alternator. I decided I would utilize the time waiting for parts to do some preventative maintenance, and overhaul the alternator while the car was in the shop. A rebuilt alternator for this car is about $200, with a new one over $400. The parts to overhaul this alternator were about $30.

How does one overhaul an alternator? Usually when an alternator wears out, it is due to the wear items reaching the end of their useful life. The wear items in an alternator are the brushes and the bearings. On this alternator, like many alternators, the brushes are part of the regulator assembly. While new brushes can be soldered in to the existing regulator, it is far easier to replace the assembly as a unit.
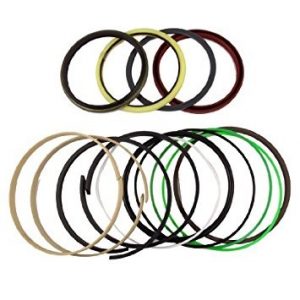
I ordered the parts on line. Surprisingly, I have found most parts stores do not sell alternator rebuild kits. I have to buy them from automotive electrical or electric motor parts suppliers.

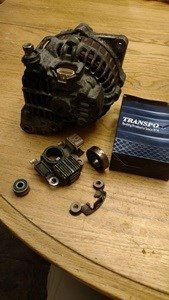
An examination of this alternator revealed the brushes were well worn, almost at the end of their useful length. Both bearings rotated freely, however sounded and felt slightly “gravely” when rotated. The rebuild kit came with both bearings and a brush/regulator assembly.

Rebuilding of the alternator was very straight forward. First, I removed the drive pulley with an impact wrench. The pulley easily slid off. Next, I opened the case by removing the four bolts holding the case together. The front of the case came off after several light taps with a hammer. I carefully compared the old parts with the ones that came in the rebuild kit to ensure I had the right parts. Once the front of the case was off, I removed the four screws that held the front bearing plate on. These screws required the application of a torch to free them, but came out easily once some heat was applied. The front bearing came out of the case easily, with a gentle push from my thumb. The new bearing easily slid into position, and was secured with the four screws and the retaining plate.

The rotating assembly was removed from the case next. A careful inspection of the slip rings showed they were in good condition. There had been no arcing against them from the brushes. The rear bearing needed to be removed from the shaft in the press with a bearing knife and a drift. Great care is exercised to prevent damage to the assembly. The new bearing easily pressed on to the shaft.

The brush/regulator assembly is soldered into the case. I needed to melt the old solder connections with a soldering iron. Careful inspection showed the remaining parts of the alternator were in good condition. I carefully cleaned the alternator case while it was apart, rinsing all pieces with electrical cleaner.

I mounted the new brush/regulator assembly in to the case, and soldered the connections with electrical solder. The brush assembly came with a small wire to hold the brushes in place. It is important to leave this wire in place, and carefully thread it through the small hole on the back of the alternator assembly. It is impossible to mount the rotating assembly into the case with this wire removed, as the spring loaded brushes will interfere with the slip rings upon reassembly.

With the brush/regulator assembly installed, the alternator can be reassembled. After assembly, it is important to ensure the alternator spins correctly, with no noise or interference.

This is an easy and inexpensive preventative maintenance step.

More Questions About Oil

From the Editor….

Dave, would you please keep this oil discussion going?

Questions….. Should we use synthetic in our old cars? What about the question of single-weight oil vs multi-weight oils in our old cars, which is best and why? You have mentioned the moisture collecting in our car’s oil pans, especially during winter storage, should oil types come into the conversation here? What about this whole question of 600 weight in our old differentials? What should we use and is 600 weight really 600 weight? Thanks Dave.

Gary, good questions.

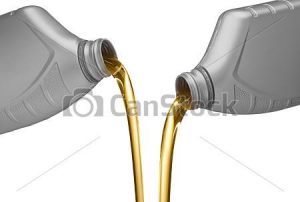
synthetic oil cansThe question of synthetic oil in our old cars is a good one. Like any selection of engine oil, it comes down to the application.
The quality of engine oils has improved dramatically since our antique cars were manufac-tured. The multi-viscosity high detergent oils available today are vastly superior to the oils availa-ble when these cars were new. Not that many years ago, engines were full of sludge and varnish from engine oil deposits. Cars needed to have the engines flushed with flushing oil during an oil change.

The additives and detergents in engine oils still break down, requiring oil changes. This happens more quickly under “severe” driving conditions. Older, carbureted vehicles with open crank case ventilation require more frequent oil changes. The fuel mixture of carbureted engines is not as well controlled as the fuel mixture of modern computerized fuel injected en-gines. Unburned fuel in carbureted engines and early fuel injected engines will dissolve in to the engine oil. Modern engines have sealed crankcases. Older cars have open crankcase ventilation, leaving an opportunity for dust and dirt to migrate in to the engine oil. Because of these reasons, oil needs to be changed more frequently in these older engines than it does in modern engines.

oil leakI have had a number of people tell me they will not use synthetic oil, because they think it will leak out. If your engine already leaks oil, this is true. Synthetic oil will not cause new leaks in an engine. If the engine has sound seals and gaskets, synthetic will not leak any more than conventional oil.
Synthetic oil is superior to conventional oil for lubricating and cooling the moving parts of the engine.

If the vehicle has a fairly new engine I would be more inclined to use synthetic oil. The parts and machining cost to rebuild an engine can quick-ly pass $5,000. Synthetic oil is a relatively inexpensive way to protect this investment.

Some vehicles, like air cooled Volkswagens, were designed to use straight weight oil. I have been told multi viscosity oils can foam up in these en-gines, and only straight weight oils should be used. I use straight 30 weight synthetic engine oil in my John Deere Tractor.

Moisture will condense in the crank case as a byproduct of combus-tion. This moisture will remain there until it evaporates away due to engine heat. The engine needs to be run for a while fully warmed up for this to hap-pen. If the car is not driven much, it makes sense to change the oil before putting the car away for winter storage.

There are many factors to consider when choosing an engine oil. The type of driving, number of miles driven in a driving season, the condition of the engine, oil consumption of the engine and cost of the engine oil should all be considered.

Ultimately, it is up to you to decide if the extra protection of synthetic engine oil is worth the extra cost.

Next month I will talk about gear oils.

Editor’s notes….. Watch the monthly VAE auction, you will find some great oil deals. Much of the time the price is half or less what you would pay at the store and the items are high quality, new products.

Synthetic Oil

Hey Dave’s Garage-

What is synthetic motor oil all about? Why is it better than natural oil? How does it differ chemically? I always thought that frequent oil changes were necessary because of the build up of acid and other contaminants. Why don’t they build up in synthetic oil the same way? Wendell Noble

Wendell, great question! There is a lot of information, and a lot of strong opinion here.

There are three types of engine oil sold in the U.S. that are considered “Synthetic”.

synthetic oilGroup III synthetics are oils based upon hydrocracked crude oil. They have many qualities of “true” synthetic oils, but they are not manufactured or “synthesized” in a lab. They are refined from crude oil.
Group IV synthetics are produced from Polyalphaolefin base stocks, and are one of the two “true” synthetic oils available in the US.

Polyalphaolefin (PAO) is a manufactured ethylene chemical used to manufacture many plastics and fabrics. It also can have good properties as a lubricant. Pure PAO alone does not work well as an engine oil. It still needs additives to work as an engine oil.

Group V synthetics are almost exclusively ester based. Like PAO based lubricants, group V base oil needs additives to be an engine oil. Group V based oils are very specific application lubricants. I don’t believe they’re used as a base in over the counter synthetic engine oil.

So, so called group III synthetics are a more highly refined crude oil, with a base stock that comes out of the ground as crude oil.

Group IV synthetics are synthesized from Polyalphaolefin (PAO).

The benefit of a true synthetic is uniformity and consistency in the molecular make up of the base oil. Unlike refined crude oil, synthetic oil has consistent molecular chains. Think of crushed gravel being ground up to similar sized pieces (conventional oil), and compare that to manufactured glass marbles (Synthetic). The marbles are more consistent in size and shape. The marbles would make a better lubricant.

Cost may be the best way to determine if oil is a true synthetic. If it is under $5.00 a quart, it is probably a group III synthetic. The true answer can be found on the bottle or the manufacture’s website.

Regardless of the base lubricant, all engine oils have additives to control viscosity through temperature ranges, and additives to keep the engine clean and well lubricated. These additives still wear out or break down regardless of the base oil used. Engine oil is also diluted with by-products of combustion through use.

So why use synthetics? Synthetic oil is a superior lubricant. The oil is consistent on a molecular level, with no impurities. Refined oil has inconsistent molecular chains and still retains trace amounts of impurities. Synthetic oil maintains viscosity regardless of temperature. Put a quart of conventional oil and a quart of true synthetic in your freezer overnight. In the morning take them out and shake them. The synthetic will still be fluid. The conventional oil will be thick like honey. Remember that next winter when it is below zero and you start your car.

Synthetic oil does not sludge and varnish in the engine as conventional oils do. I have opened up engines with over 200,000 miles on them with synthetic oil, and they look like new inside.

Oil change intervals should still be dependent on driving conditions. Short distance driving is “severe” duty. It is often a good idea to do a Used Oil Analysis to get an idea of when to change your oil. A UOA may show your used oil did not need to be changed, and was still able to properly lubricate. You may find a vehicle with synthetic oil, with few short trips can go 10,000 miles or more before the oil needs to be changed.

From the Editor…. Dave, would you please keep this oil discussion going?

Questions….. Should we use synthetic in our old cars? What about the question of single-weight oil vs multi-weight oils in our old cars, which is best and why? You have mentioned the moisture collecting in our car’s oil pans, especially during winter storage, should oil types come into the conversation here? What about this whole question of 600 weight in our old differentials? What should we use and is 600 weight really 600 weight? Thanks Dave.